
Archive for the ‘Plesk Web Hosting’ Category
Free software included in your web hosting package
Sep 17 12
Included in Your Name Here’s web hosting packages are a number of useful tools, including the Web Application vault.
You can significantly increase your website functionality by using different web apps. Apps installed on a website can perform a number of tasks. If you are an individual, you can, for example, present yourself with a blog or organize an online storage of your media files. Companies can move their business online using the e-commerce or ![]() CRM web apps. All these apps are available for installation from the Applications section of the Customer Panel.
CRM web apps. All these apps are available for installation from the Applications section of the Customer Panel.
Inside the application vault you will see your current applications. Click on ‘All available Applications’ and this will show all categories for different types of applications you can install.
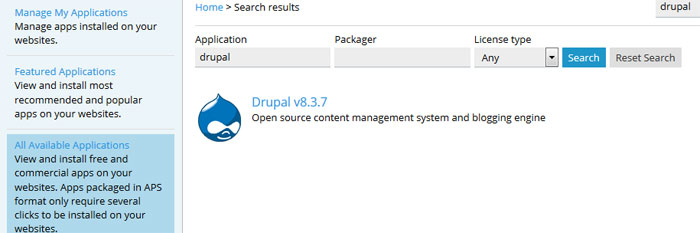
 Click on each category to browse available applications, or if you know the name of the app you want to install then type it directly into the search box.
 Click on the ‘Install’ button and the application will be added automatically. You will be asked what username and password you would like and these are the details you use to login to the admin area of your new application.
Low price continues for hugely popular Site Builder
Jan 13 10
Since we launched our new Web Presence Builder several months ago, it has proven to be a big hit.
We will be keeping the price of this offer at £29.95. When you consider the price includes the registration of a domain name, 250MB of web space and the easy to use site building software, it really is an offer not to be missed.
The Site Builder package is perfect for anybody who requires an online presence, but does not have any technical knowledge or experience with Web Design:
For more details and instructions on how to order please got to:
http://www.your-name-here.co.uk/site-builder.html
Make the most of your Web Hosting with Plesk Application Vault.
Apr 12 30
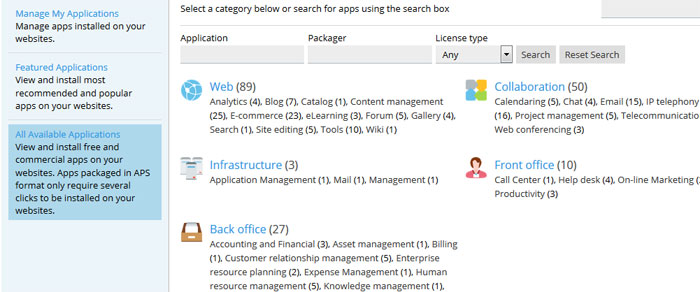
At Your Name Here all our Web Hosting packages all come with the Plesk Application Vault. Accessed via the control panel, the Application Vault provides a large number of ‘One Click Install’ software programs.

Once logged into your control panel, click on ‘Web Applications’ and then ‘Install Web Application’ and you will be shown the above screen. You can browse through each of the categories to find lots of applications that can do a number of cool things to your website.
Popular applications include:


Once you’ve chosen your application simply click on the ‘Install’ icon and the program will automatically be set up for you. You just need to enter an administrator password and the directory you would like to install the software.
The software will then be shown as an installed application in your control panel and you can click on a link to take you to the application’s login page.
New Site Builder for 2012
Feb 12 28
An easy and quick way for small businesses to create professional looking websites.
If you would like your own website but don’t know how to do it, our new Website Builder is just for you. In just 3 easy steps you can have a fully operational website ready to go.
Firstly choose your web address: 
(myownwebsite.co.uk or
myownwebsite.com)
Then we will set up your domain on our server and enable the Website Builder for you. Just choose the type of business for your site and a template of your new site will automatically be created for you:

You can then replace the template text with your own, add your own images and add extra modules such as a shopping cart, all with a few clicks of a button.

Once you have arranged your layout, added your pages and added your new content, simply click on ‘Publish’ and your new design will be made live on the Internet.
Any updates or changes can be made to your site – just login to your Web Builder again, make the necessary adjustments and click on publish again. It really is as easy as it sounds!
To try the demo click here.
New Plesk Servers
Oct 11 19
We will be moving reddwarf.1st4domains.co.uk to it’s new UK server this evening.
From tomorrow morning onwards you will need to login to the new contol panel address as follows:
https://ynh7.uk.easy-server.com:8443
with your exisiting username and password.
If you used the IP address for the FTP host you will need to change this to :
ftp.yourdomain.co.uk
(obviously replace yourdomain.co.uk with your actual domain).
Please get in touch with any queries but we hope you will be much happier with the speed of the new server.
Free Plesk Site Builder
Feb 10 04
Special Offer Extended
Due to the popularity of the Plesk Site Builder we have decided to extend the free offer for a further month. Purchase any domain with a hosting package and you will receive the Plesk Site Builder free of charge for 1 year.
Parallels Plesk Sitebuilder is an easy to use, scalable web application designed to create and manage websites. The software’s easy-to-use, five-step wizard and 14 dynamic modules make this software a powerful and flexible solution. The modules included are: Blog, Image Gallery, Guestbook, eShop, SitePal, Forum, Feedback, Registration, RSS Reader, Voting, Script, Area Map, File Download, SiteMap, External Page, and Flash Intro.
Plesk Site Builder Now Available
Nov 09 23
New Launch
We have recently introduced the Plesk Site Builder as an optional extra for all our hosting packages. For November and December we have a special introductory offer – Purchase any new Hosting Package and you will receive the Site Builder for free.
Plesk Sitebuilder includes an easy to use five-step wizard. No Web Design or programming experience is necessary.
- Create the design of your website (choose from many free templates)
- Structure the website.
- Edit the content.
- Define parameters.
- Publish the Website
For full details please visit our Site Builder page.
How do I upload my webfiles?
Sep 09 29
There are two main ways to upload your website files to your web hosting server:
FTP (File Transfer Protocol)
The most common way to upload your files is through FTP. This requires an FTP program. There are many FTP programs out there but we would recommend Filezilla as it is very user friendly. You can download Filezilla free from the following address:
http://filezilla-project.org/ 
and click on ‘Download Filezilla client’
Once you have downloaded this, open up Filezilla and click on the top left icon (computer screen) and click ‘New Site’ and enter ****domain*** or any description as this is just the label for the site, then enter the following details into the boxes:
Host = Given in your web hosting welcome email
Port = 21
Servertype = FTP
LogonType = Change the drop down list to Normal
Username = Given in your web hosting welcome email
Password = Given in your web hosting welcome email
Then click Connect, and double click on the ‘httpdocs’ folder to enter
your hosting webspace.
Once you are connected you will have 2 split windows, the left hand side is the files on your computer, the right hand side is your web space, in order to upload your files you need to either drag and drop from left to right, or double click on your left hand files to upload to the right. You will notice the transfer progress on the bottom of the screen. If all is well Filezilla should display the files you have uploaded on the right hand screen and your website should now be visible in your internet browser window.
Using the Plesk File Manager to upload your files.
This method comes on any package hosted on a Plesk server 
You will be given your control panel user details in your welcome email. Once logged into the control panel you will see this icon. Click on this and you will again be connected to your server’s web directories and again click on ‘httpdocs’ to manage your webfiles.
How to use the File Manager
Once you click into your httpdocs directory your webfiles will appear as in the image below:

Other commands you can do from here would be to create or delete folders and files, change file and folder permissions, edit existing files and rename files and folder. Here are a few more helpful tips to use with Plesk’s File Manager:
- To upload a file to the current directory, click add new file, then either browse your computer or ‘create new’ file and specify its location. Click OK.
- To create a folder that will be located in the current directory, click ‘Add New Directory’, then type in the directory name in the Directory name field and click OK.
- To edit an existing file source, click the Edit File icon (pencil). The File Manager’s editor window will open, allowing you to edit the file source. When you have finished with your changes, click ‘Save’ to save the file then OK to save the file and return to the File Manager panel.
- To remove a file or directory, select the corresponding checkbox, and click Remove Selected.
- To rename a directory or file, click on the Rename icon (small rectangle). A new page will open allowing you to rename the selected file or directory. Type in a new name and click OK.
- To change permissions for a file or directory, click on the permissions icon (which will look something like rw- r– r–) the permissions settings page will open, allowing you to set the required permissions. Select the correct settings for the file then click OK to submit.
Web Hosting News
Sep 09 16
We’re currently looking into upgrading our servers to Plesk 9 which includes a greylisting feature ideal for blocking spam.
http://www.parallels.com/uk/products/plesk/new/
We’ve already starting using this method for our own mail delivery outside of Plesk which works very well and reduces spam by about 90%!
More soon!