
How to set up your email account on a Samsung Galaxy
Feb 18 09
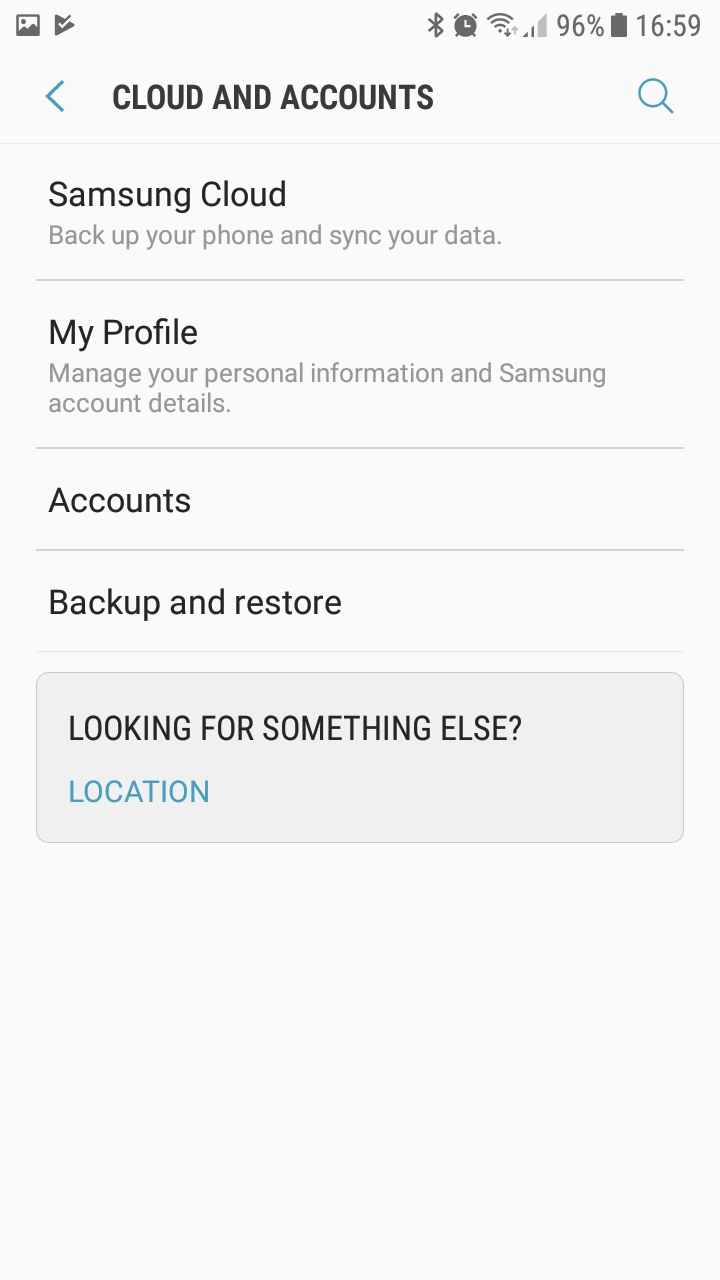
The following instructions are for setting up your domain’s email address on your Samsung Galaxy device. Firstly go the the Settings sections of your device and click on ‘Cloud and Accounts’ and then click on ‘Accounts’

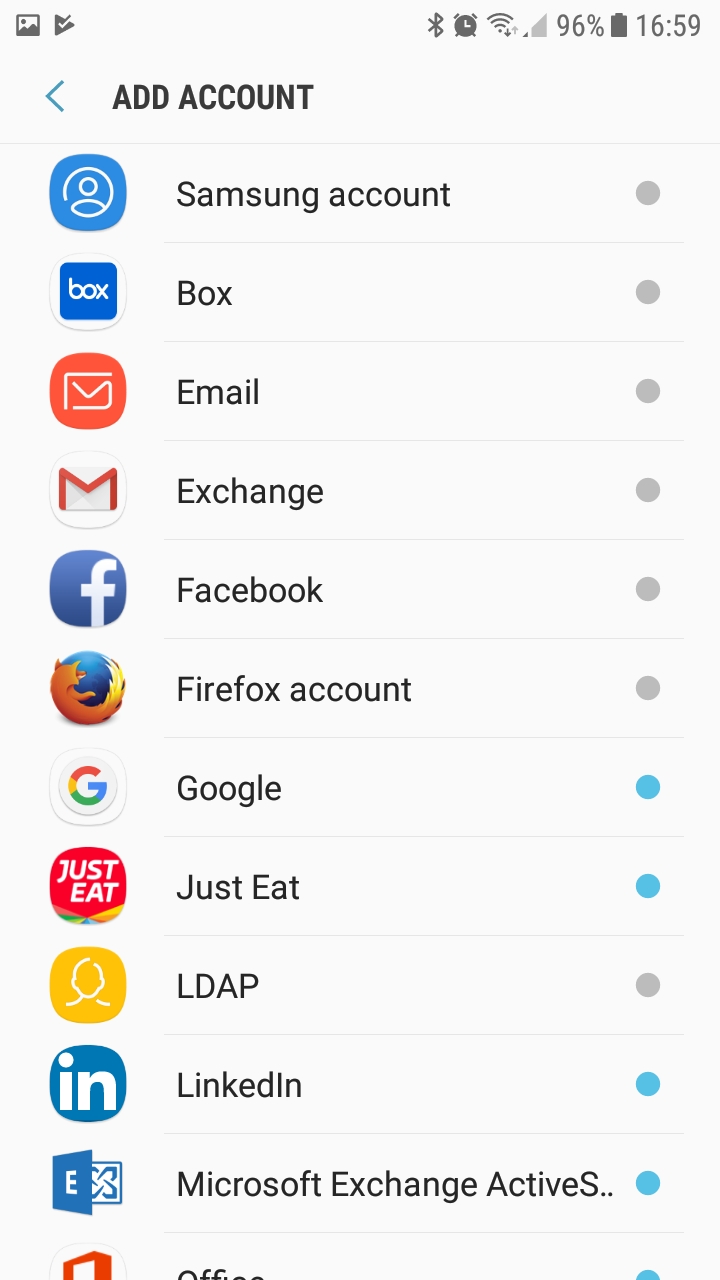
Then click on ‘Email’ to set up your own domain email account
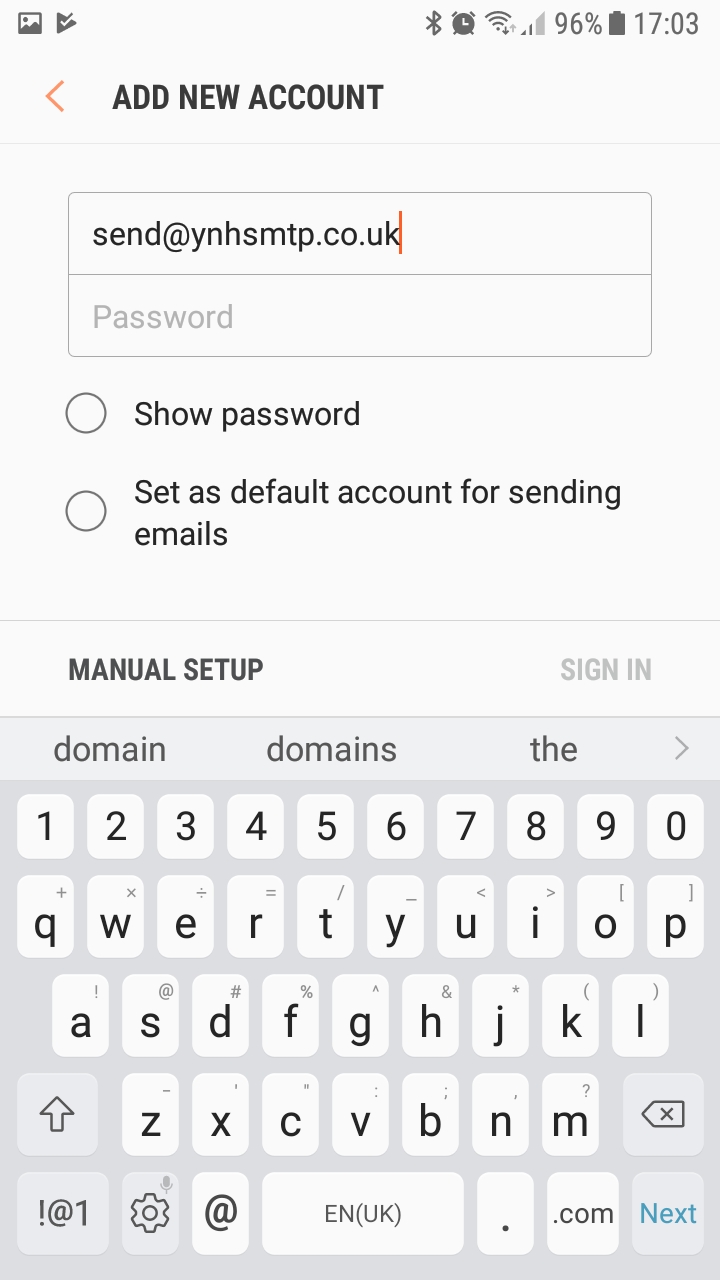
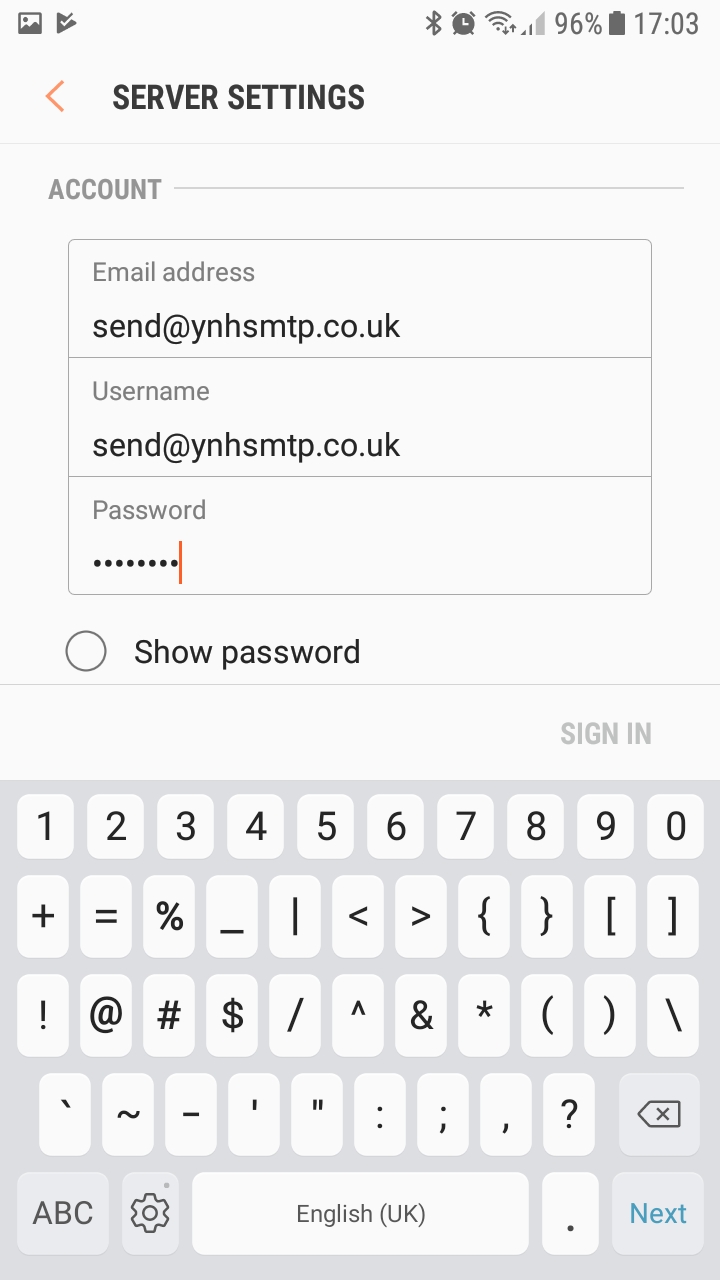
Then you will be prompted to add your email address and password. Once you have entered this ionformation click on ‘MANUAL SETUP’
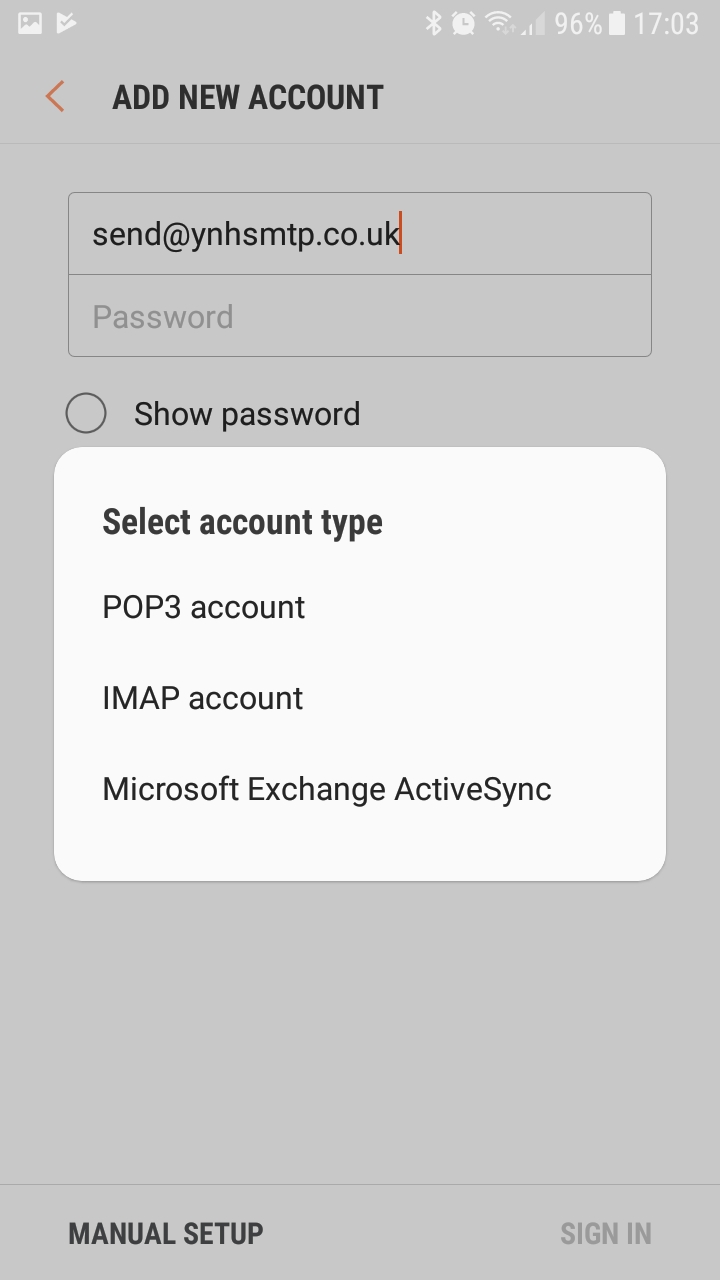
It will then ask you if you would like to set up a POP or IMAP account. For further information on choosing between POP and IMAP click here.
Your username should be your full email address:
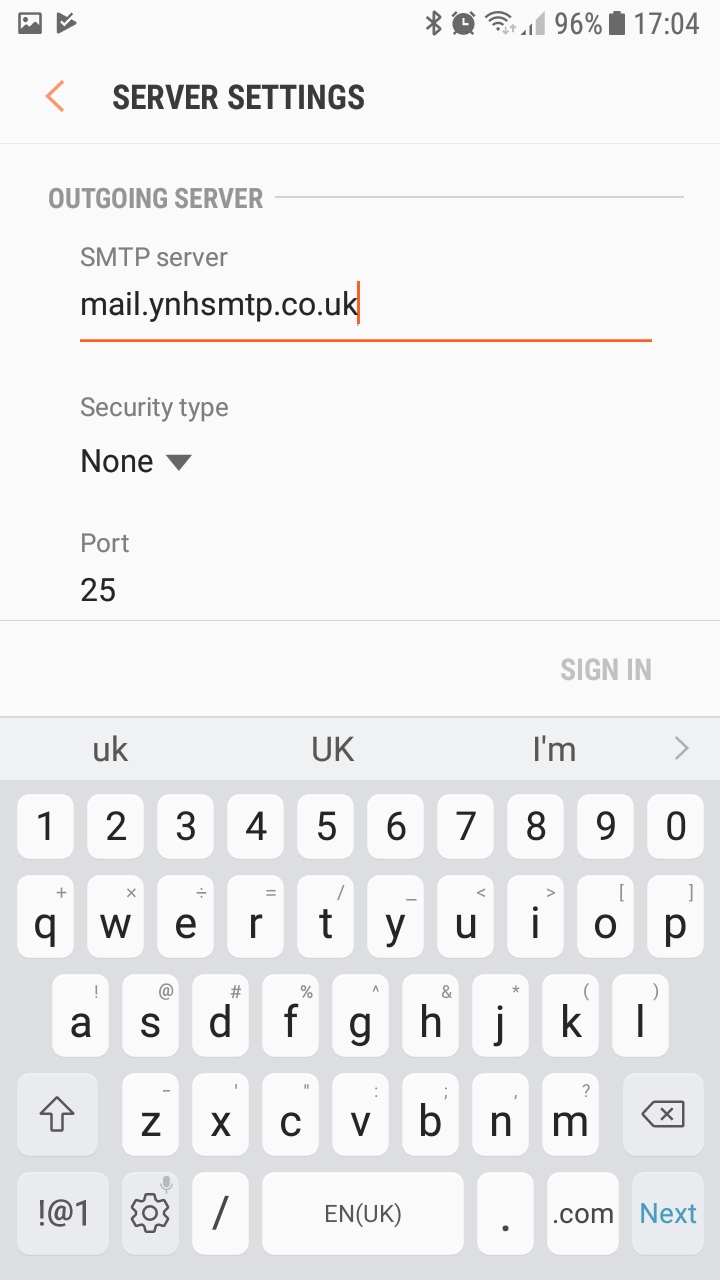
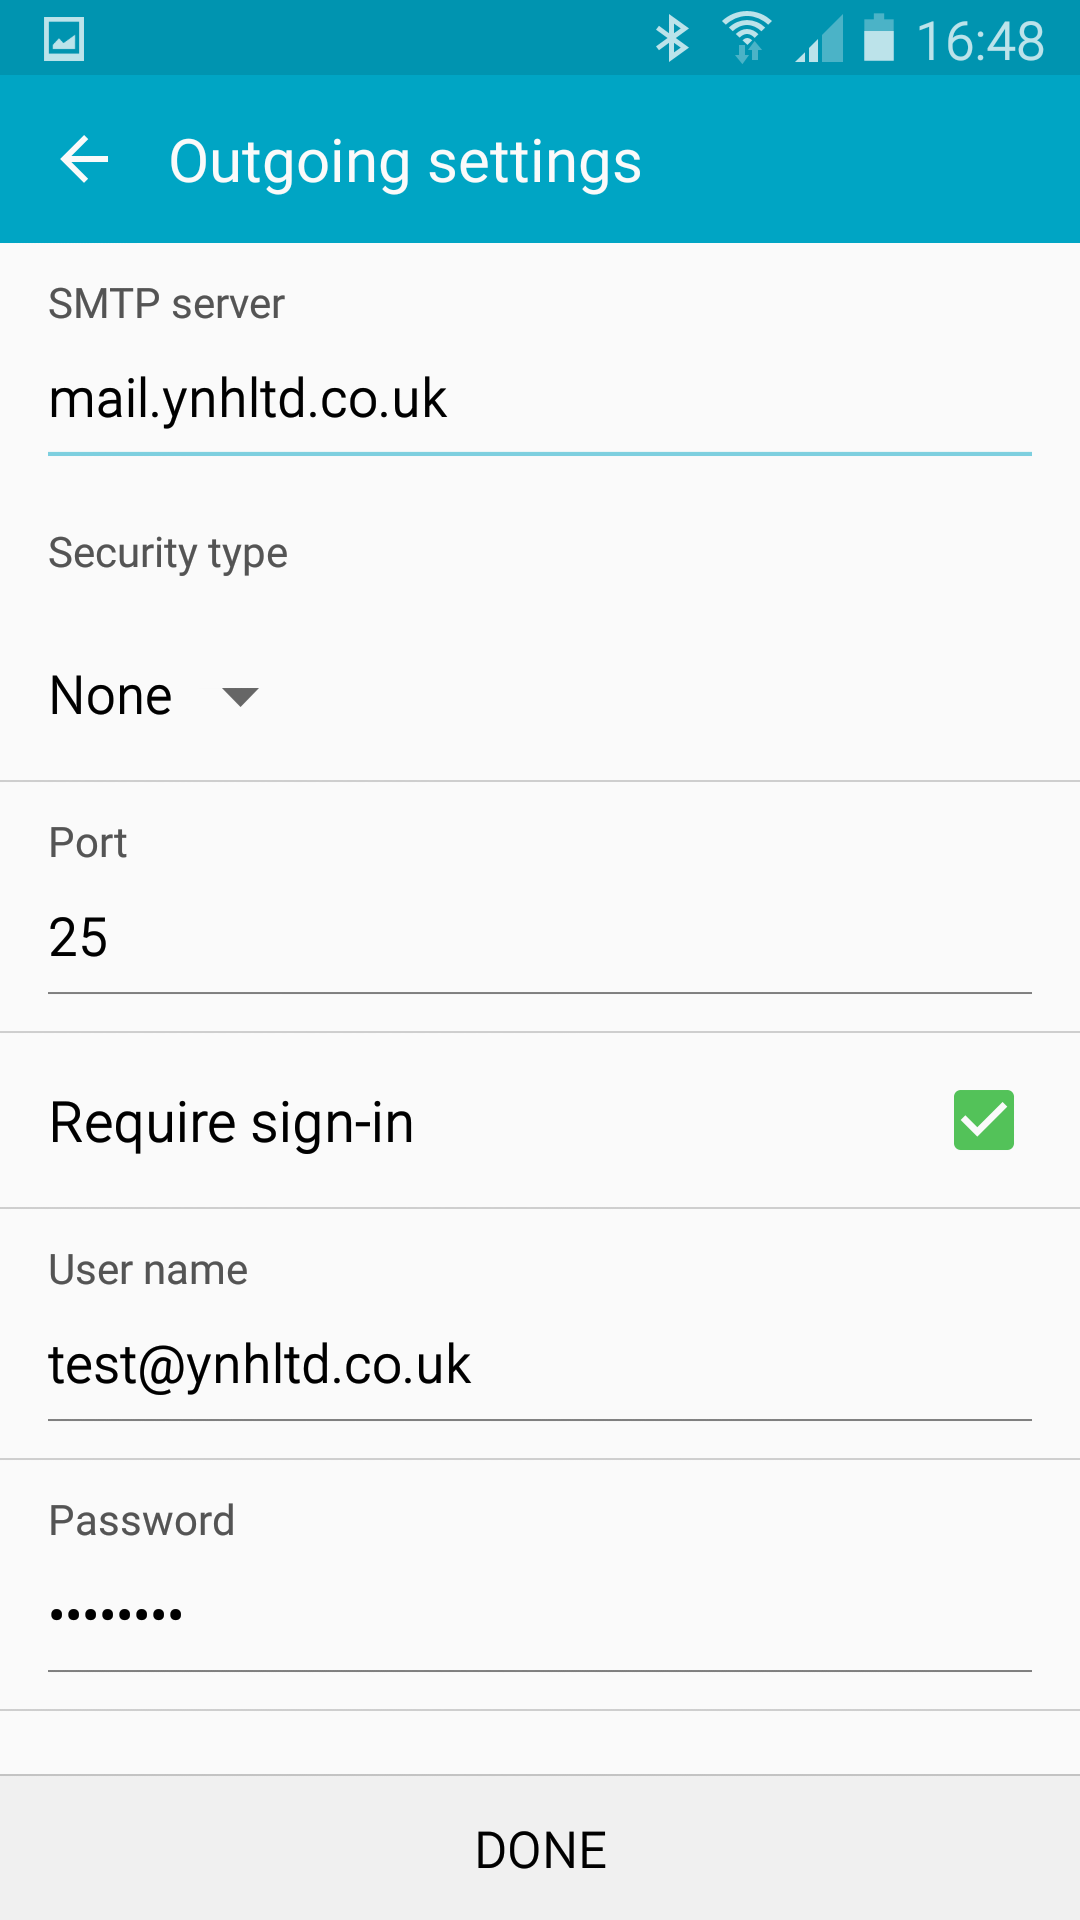
You will then be asked for the incoming and outgoing mailserver addresses and this will be mail.yourdomainname.co.uk (replace yourdomainname.co.uk with your actual domain name)
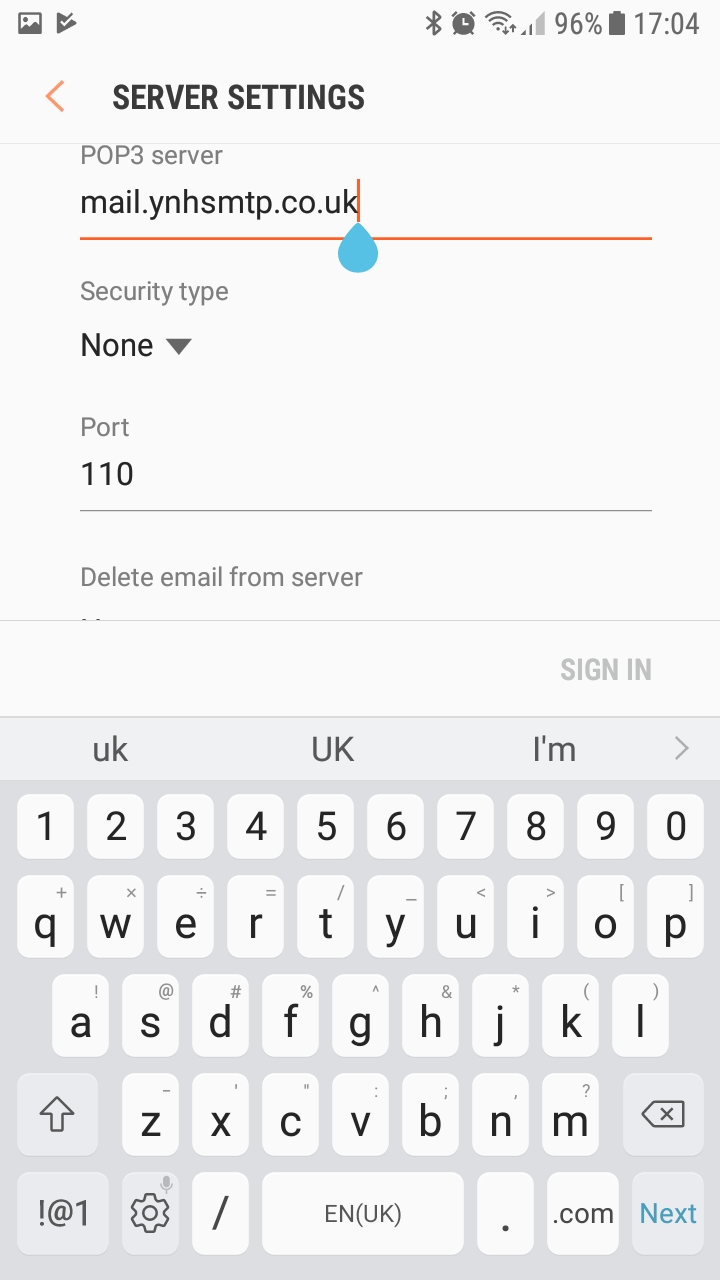
The address is exactly the same for the outgoing mailserver. Keep the port numbers to the defaults.
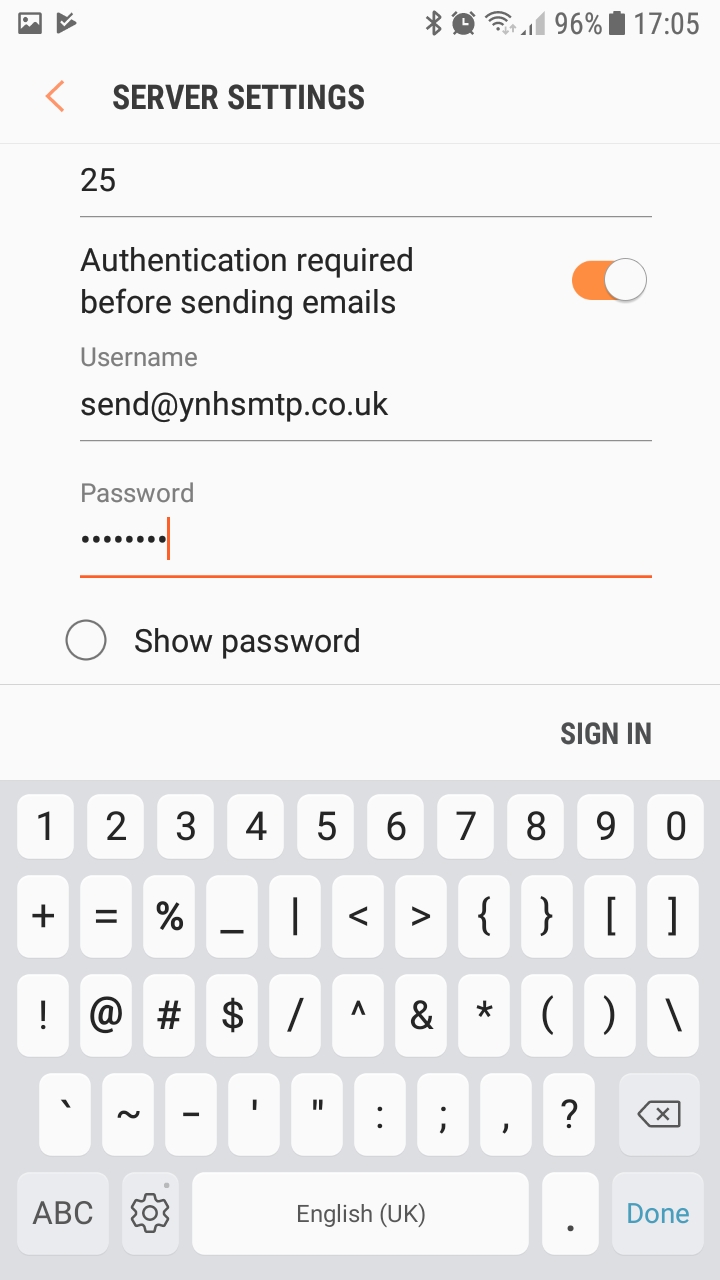
The outgoing server requires authentication so enable this option on this screen:
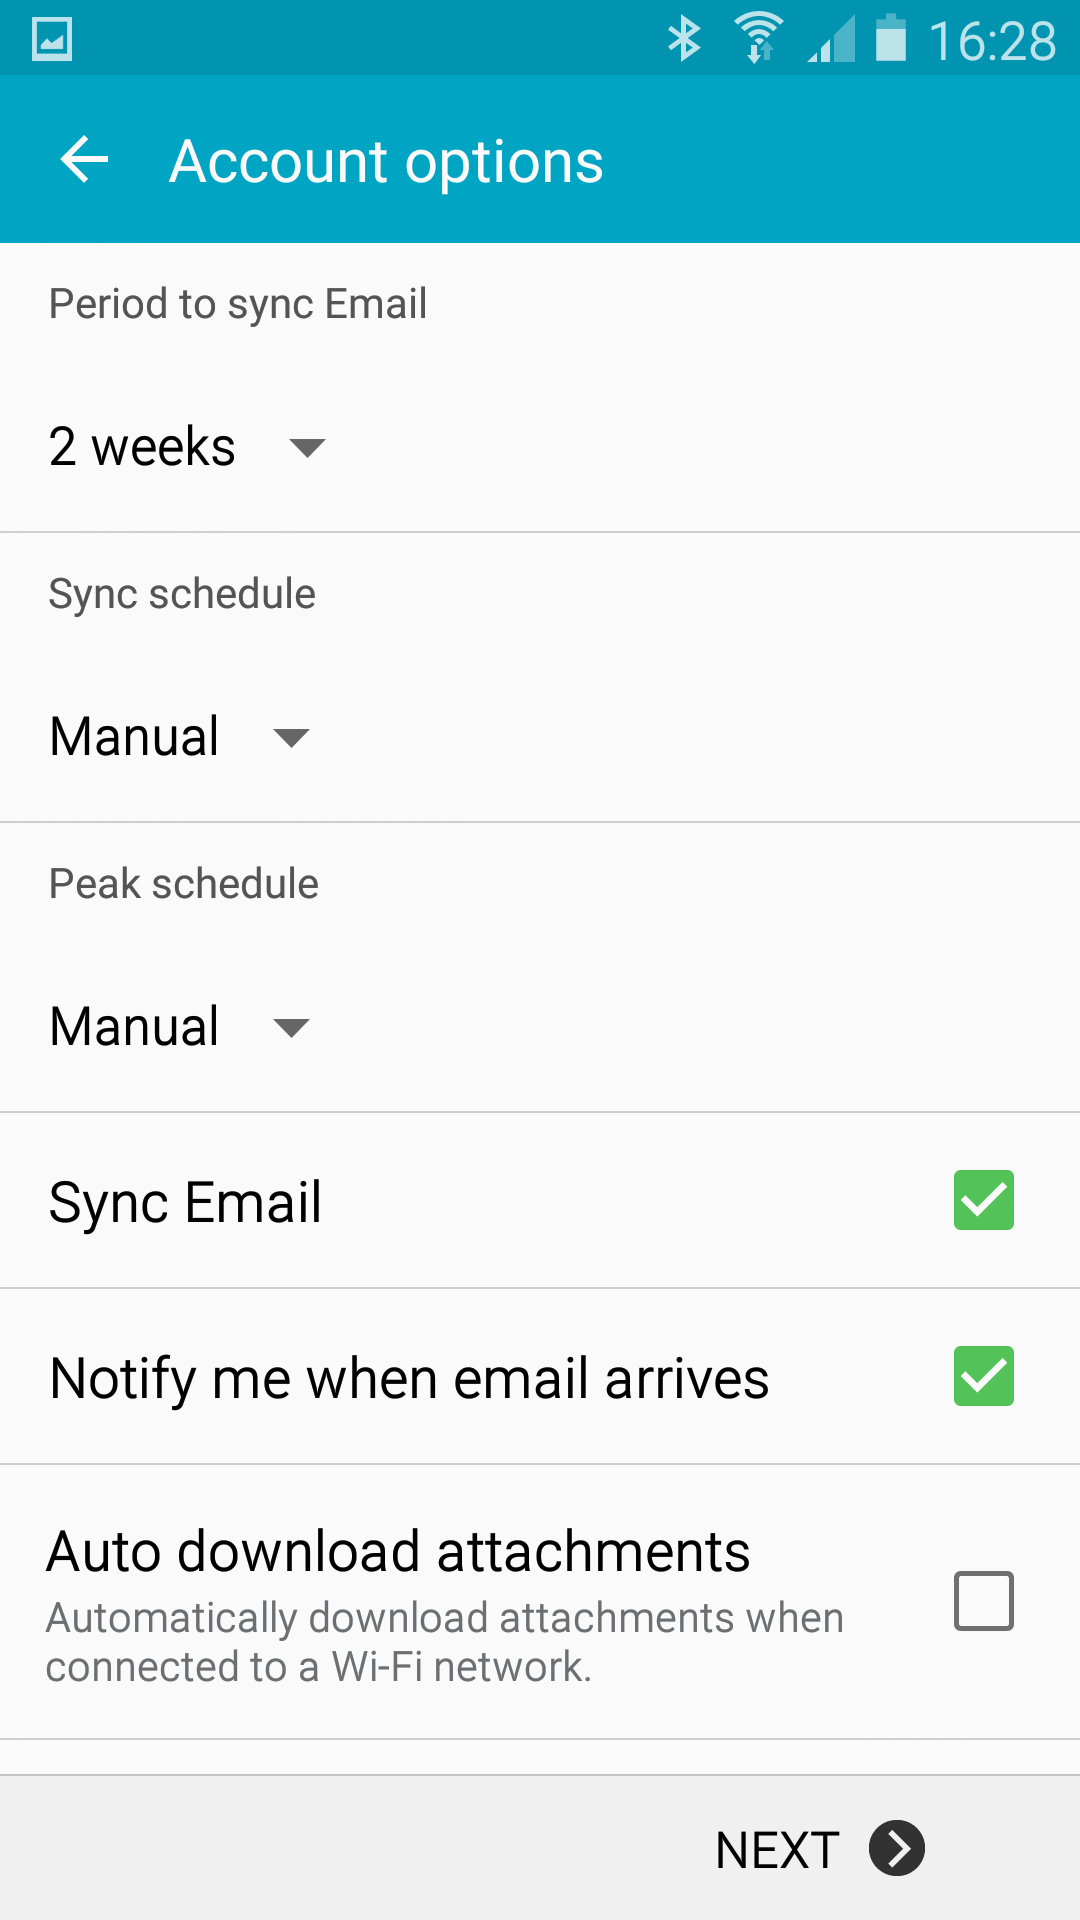
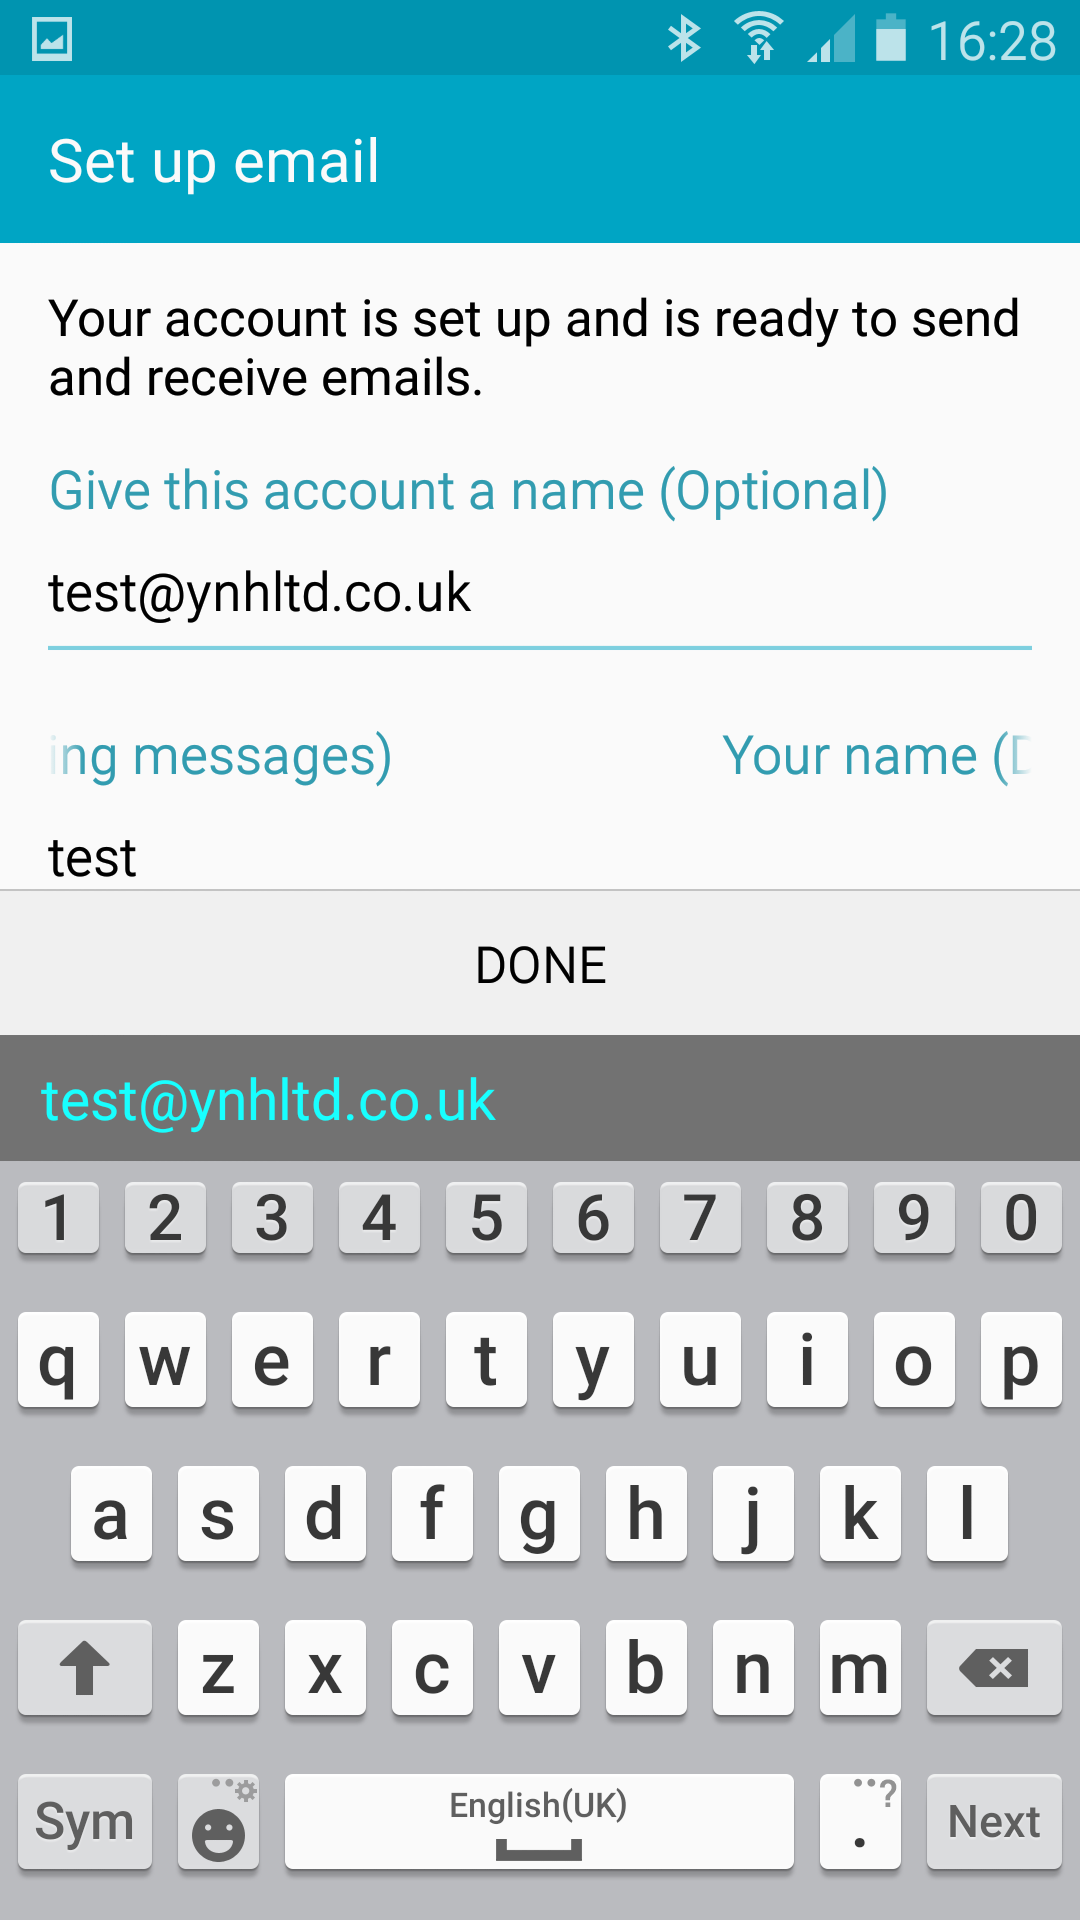
Once you have entered this information the account is set up and it will return you to the accounts screen:
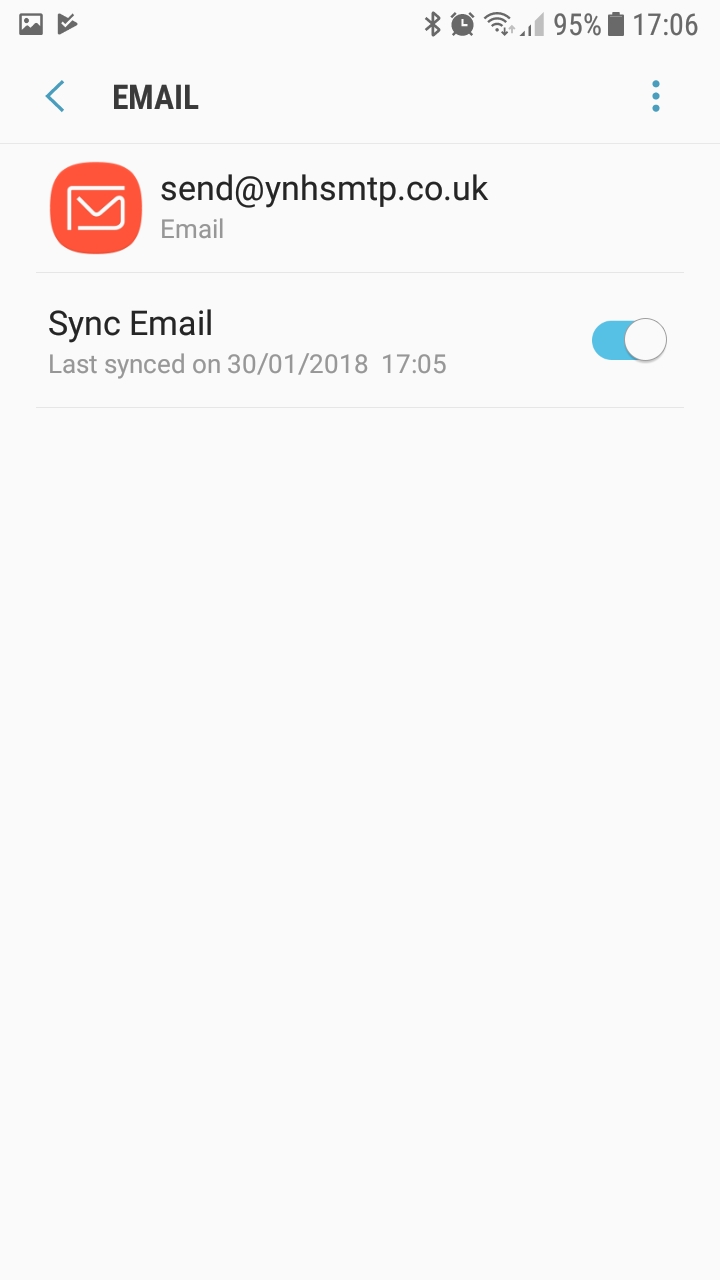
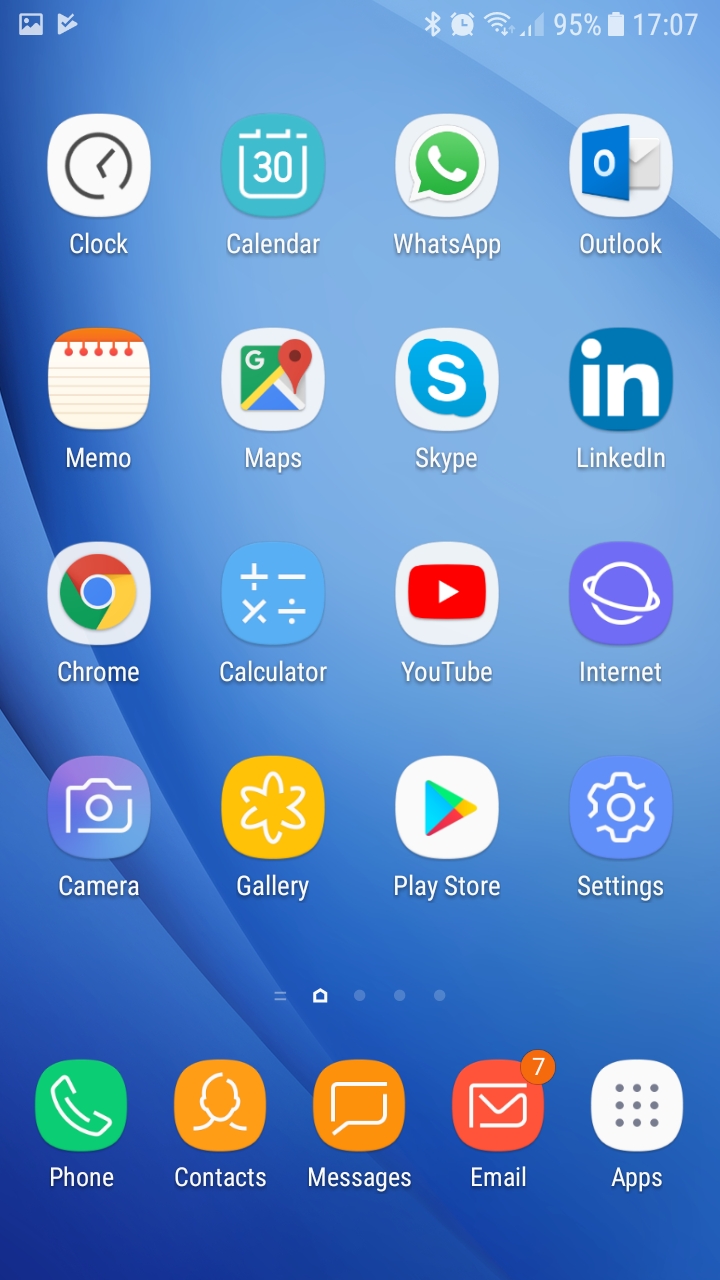
You can then return to your homescreen as your account will be ready to go:
How to set up your email account on an Iphone
Jan 18 16
The following instructions are for setting up your domain’s email address on your Iphone or Ipad:
Firstly go the the Settings sections of your device and click on ‘Mail, Contacts, Calendars’ and then click on ‘Add Account’
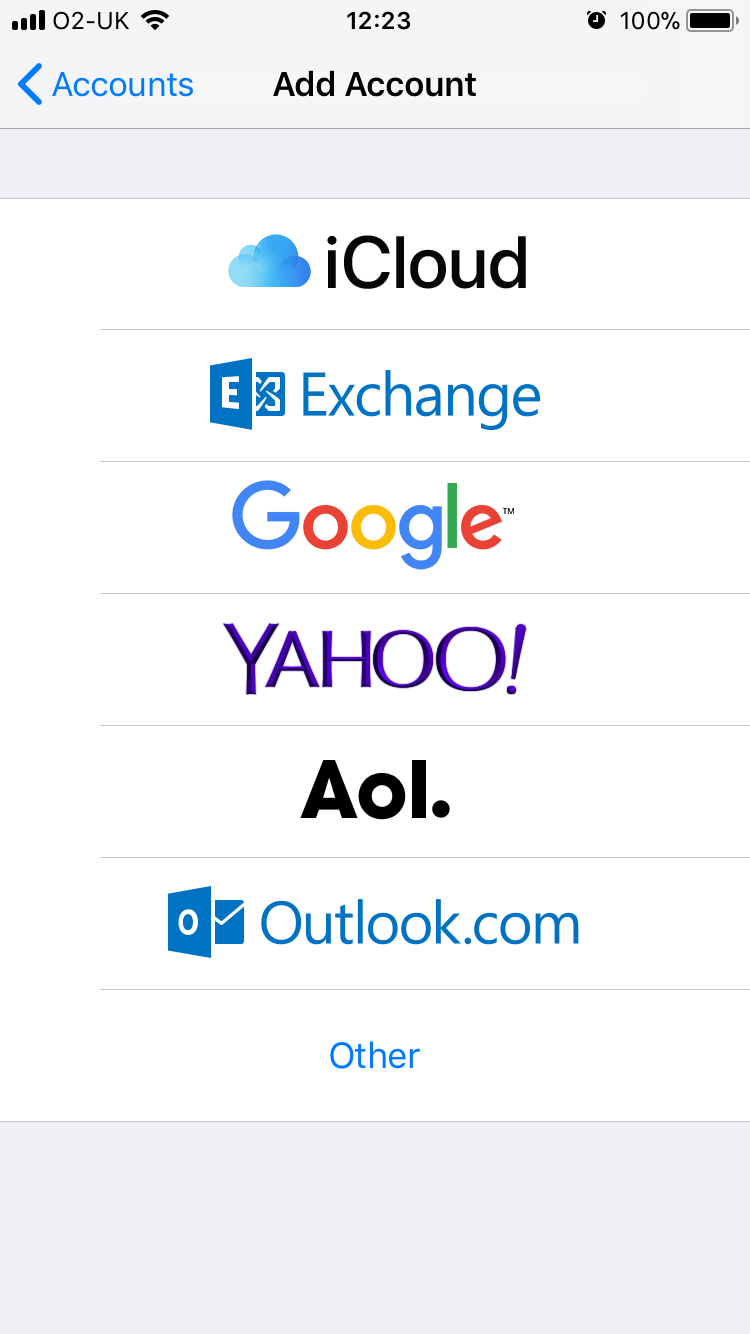
You will see the options above – click on ‘Other’
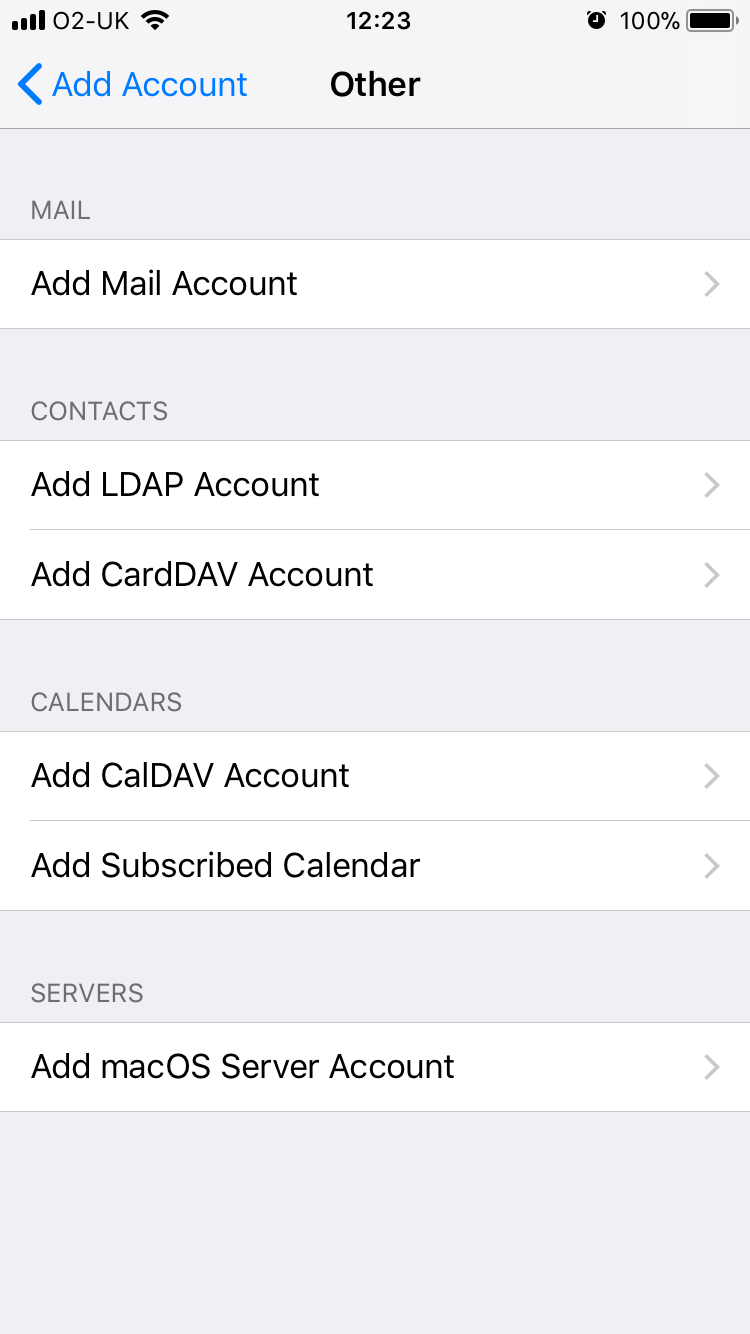
Then click on ‘Add amail Account to enter your account settings.
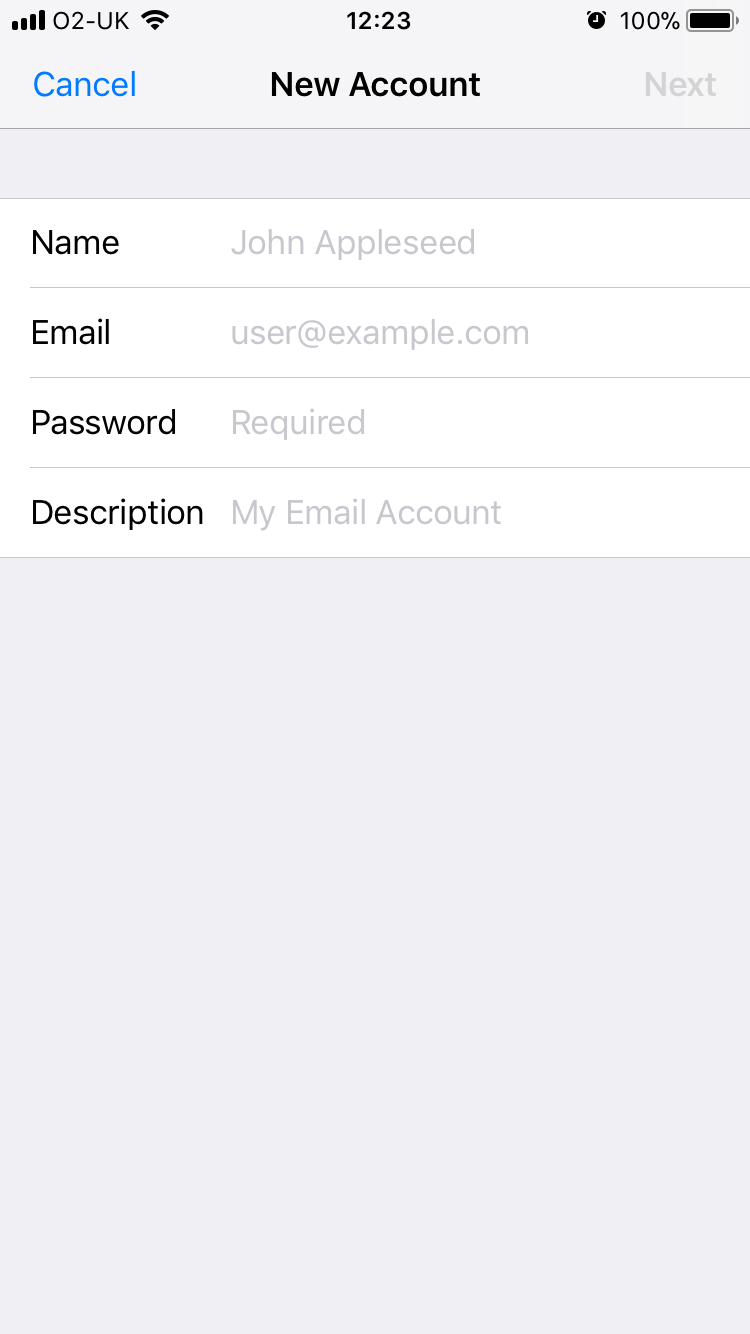
Enter the details of your email address with the same password you used in your control panel when setting up the mailbox.
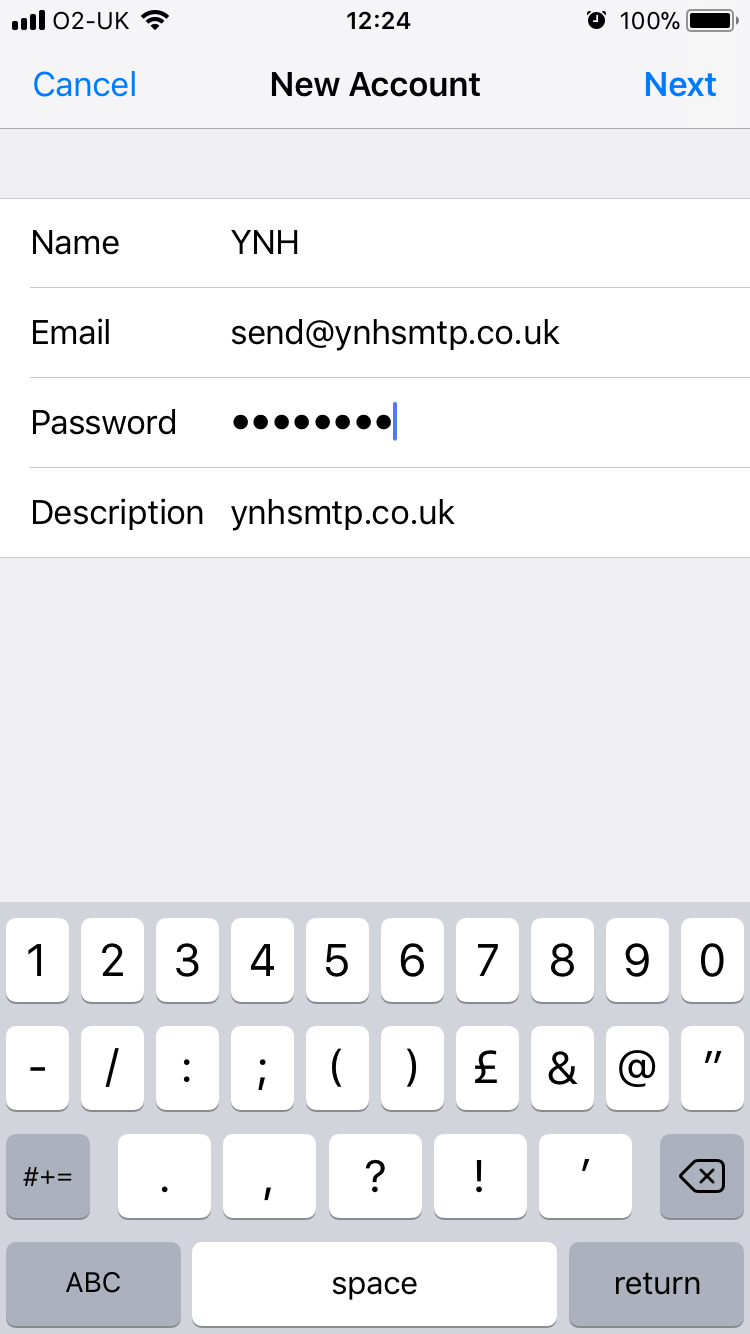
The following page lets you choose whether you would like the account set up as an IMAP or POP account. For more information on choosing IMAP or POP click here.
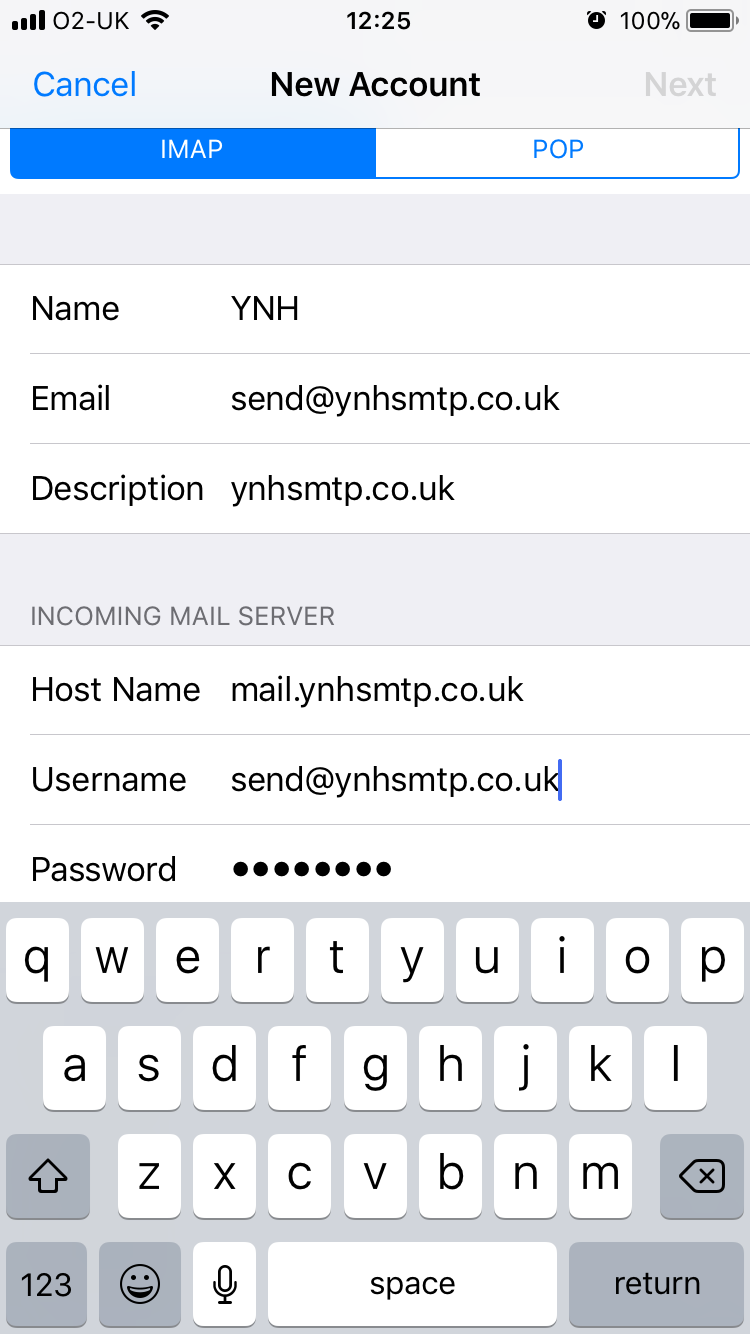
This is also where you enter the details for the incoming mailserver, which will be mail.yourdomainname.co.uk (obviously replace yourdomainname.co.uk with your actual domain name).
The username will be the full email address you are setting up and the password will be the same password you set up for the mailbox in your control panel.
You can also refer to your confirmation email for further details on setting up emails in your control panel.
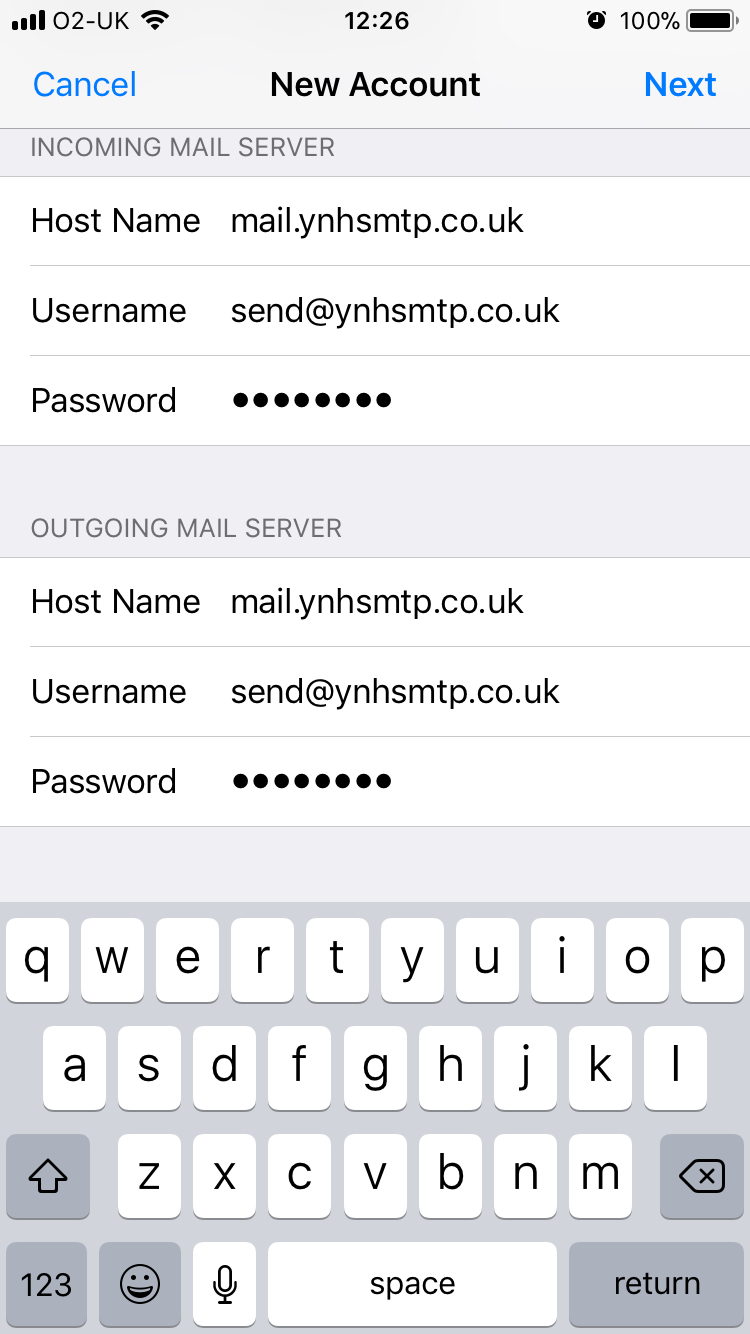
You are then prompted to enter the user details of the outgoing mailserver. For this just duplicate exactly what you entered for the incoming mailserver.
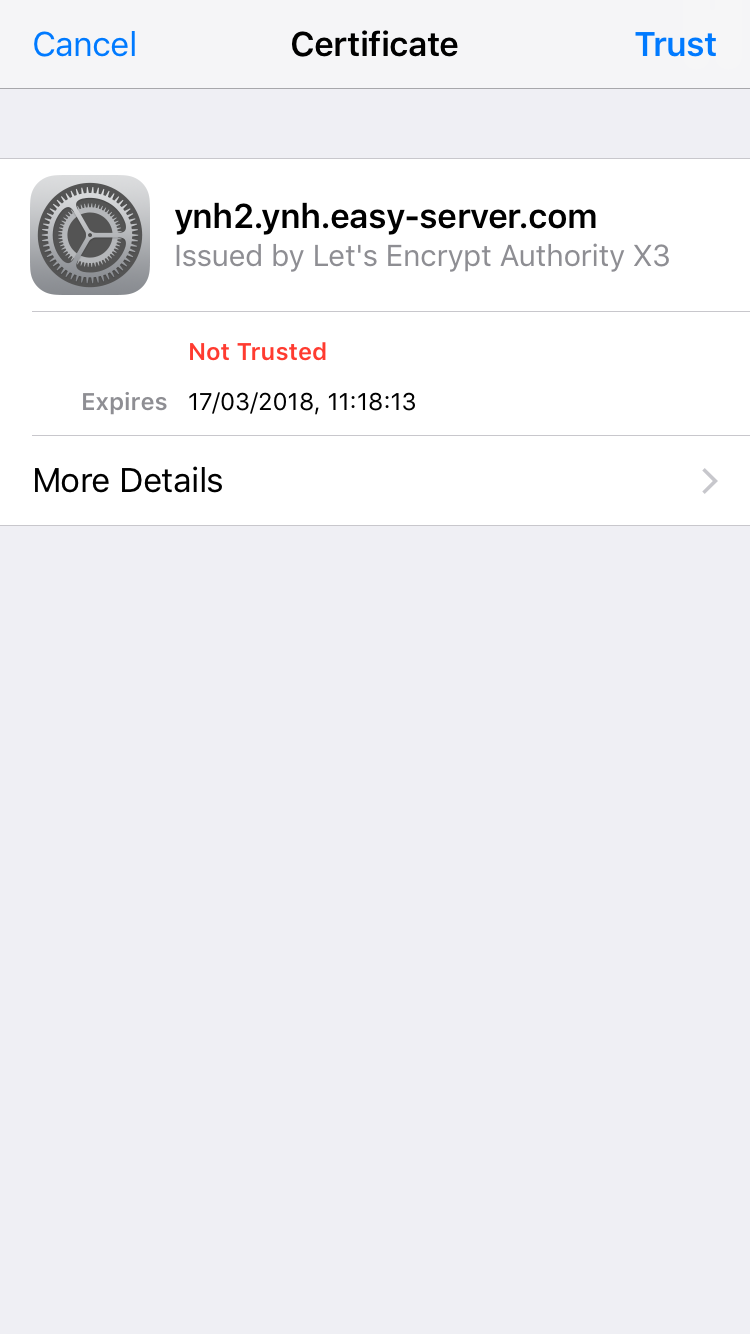
If the phone has an issue connecting to the mailserver security certificate you may see the following:
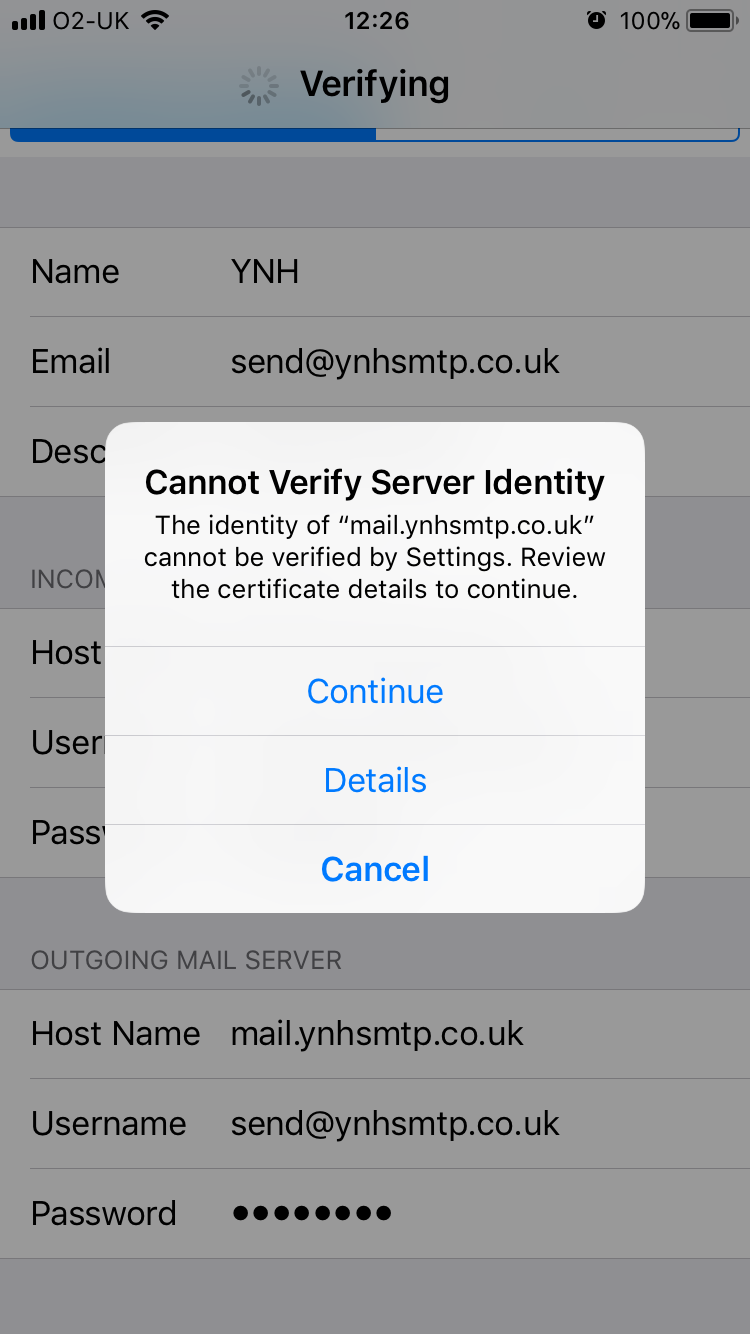
If you get this then click on ‘Details’ then ‘More Details’ then click on ‘Trust’ in the top right hand corner:
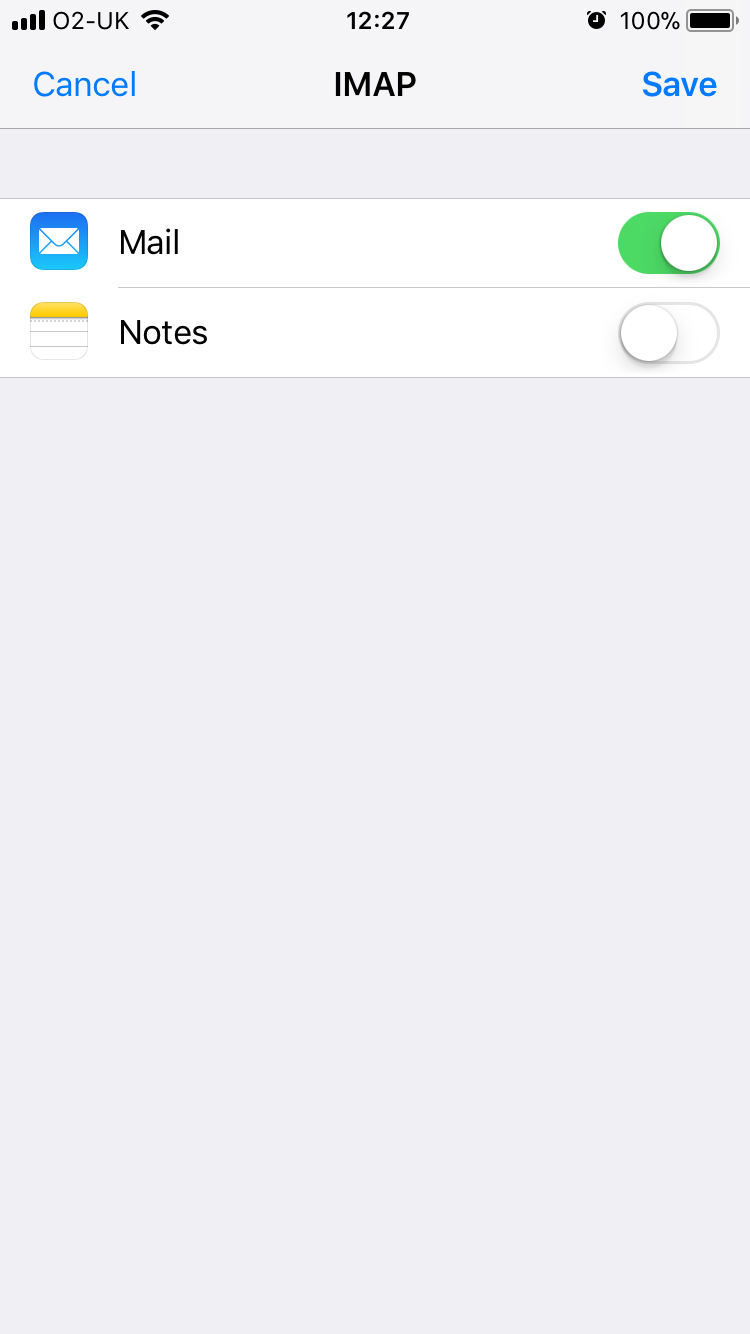
The set up of your mail account is then complete. Then just ensure that you have the mail service switched on:
New Site Builder
Nov 17 21
Your Name Here have launched a new and improved Site Builder. It is the easiest way to build a website, with no technical knowledge required.
It is a simple step by step process which will leave you with a professional looking and responsive website that works on all devices.
Once you have your Site Builder account set up you will be able to access it by clicking on the Site Builder icon in your control panel.
You will first by give the following page where you can browse through all the templates on offer before choosing which one is right for your website:
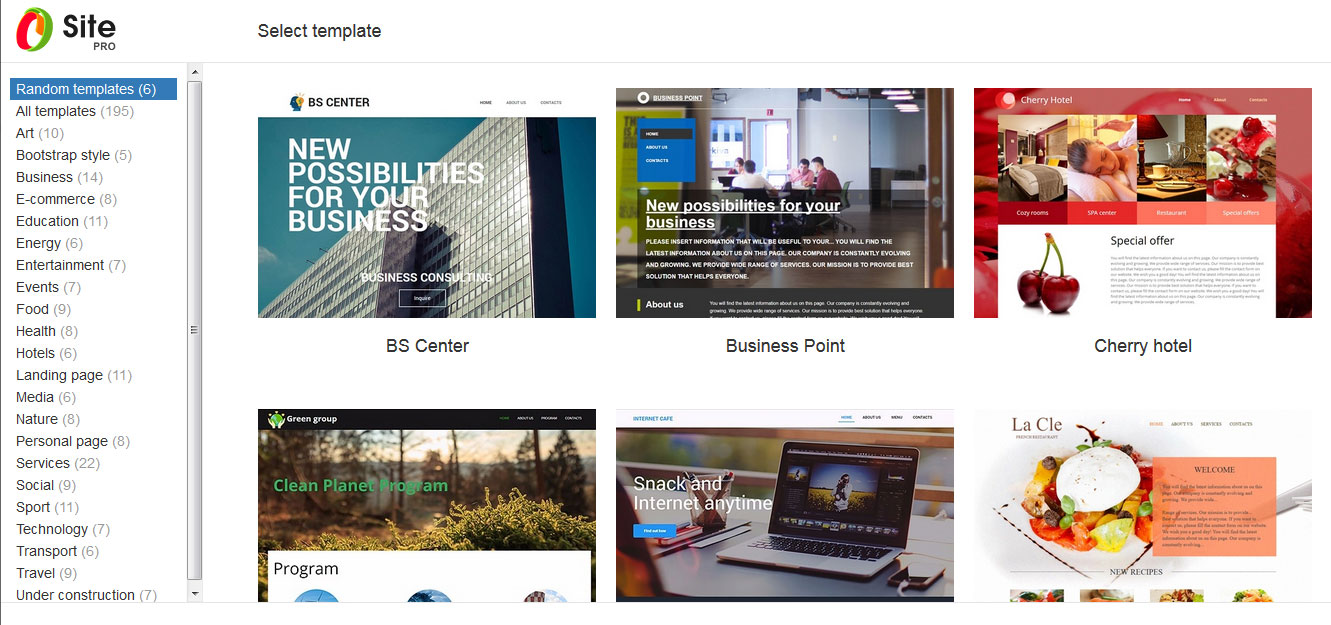
You can highlight any template and preview how it looks. Once you are happy with your choice, click on select and this will load your website design.
Your admin panel will then be loaded, showing you all your design options. There is a ‘Steps to Do’ panel which will also load advising what you need to do next:
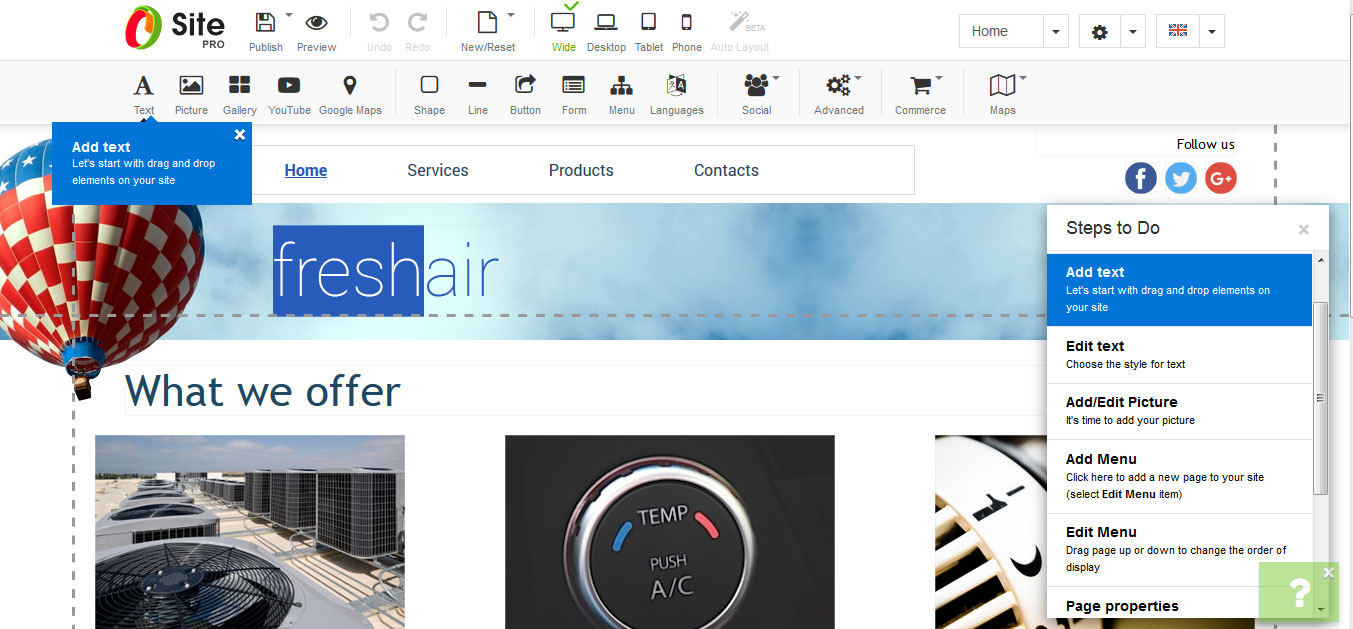
Text is added by a simple ‘drag and drop’ as are images, so they can be positioned anywhere you like. Additional shapes and lines can be added as and where you wish. The majority of templates will come with a menu, but you can easily add one if not by the simple drag and drop method.
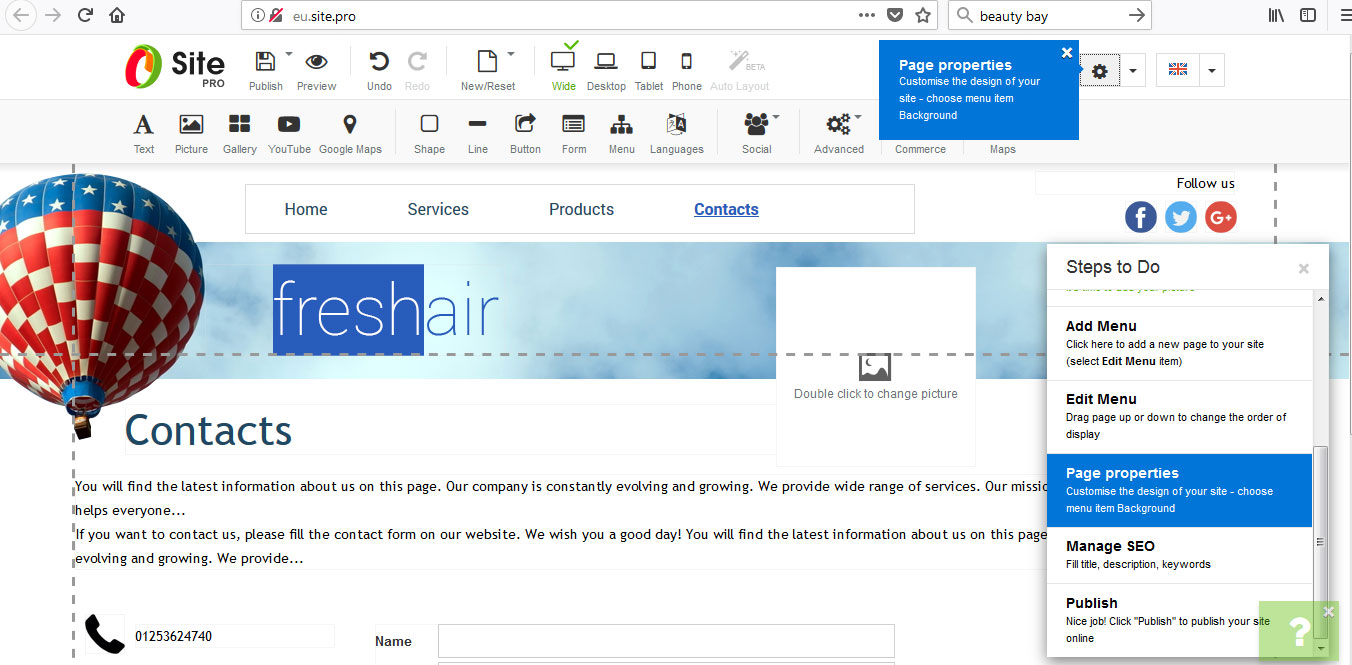
You site can be further customised using the Page Properties tool:
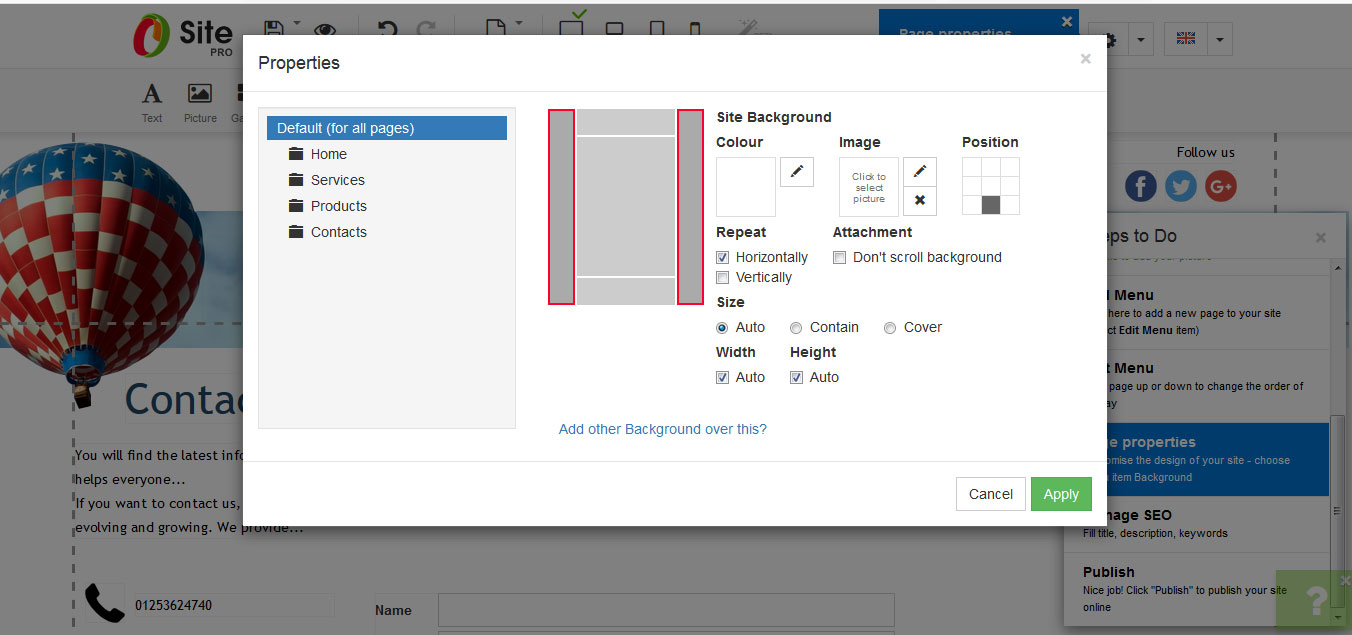
The background can be edited on one or all of the pages to add a background colour or image, along with length and width of your website:
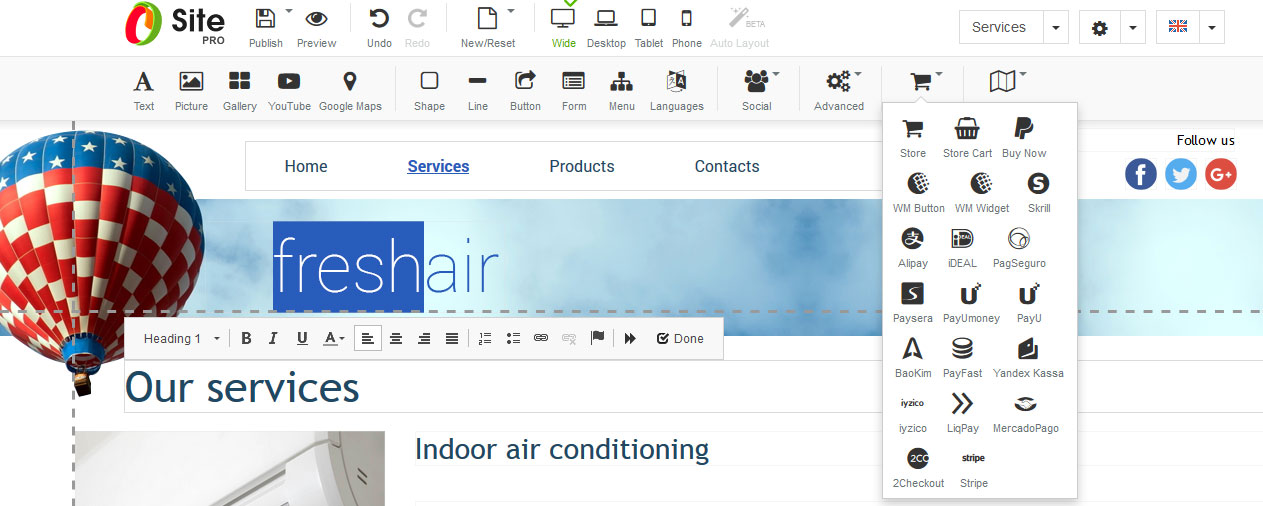
Additional services can be added to make your website dynamic, including social media links and e-commerce programs for online selling:
Any changes you make to your site are automatically saved every time, so you can come back to make additions many times before you have your site completed.
Once you are happy with your design, you click on ‘Publish’ to make it live:

You can go back and make further changes to your website at any time. Any changes will be live on the internet straight away.
Free software included in your web hosting package
Sep 17 12
Included in Your Name Here’s web hosting packages are a number of useful tools, including the Web Application vault.
You can significantly increase your website functionality by using different web apps. Apps installed on a website can perform a number of tasks. If you are an individual, you can, for example, present yourself with a blog or organize an online storage of your media files. Companies can move their business online using the e-commerce or ![]() CRM web apps. All these apps are available for installation from the Applications section of the Customer Panel.
CRM web apps. All these apps are available for installation from the Applications section of the Customer Panel.
Inside the application vault you will see your current applications. Click on ‘All available Applications’ and this will show all categories for different types of applications you can install.
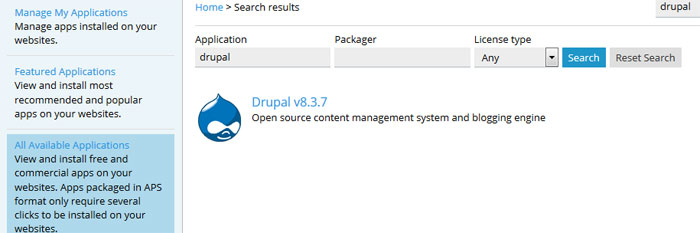
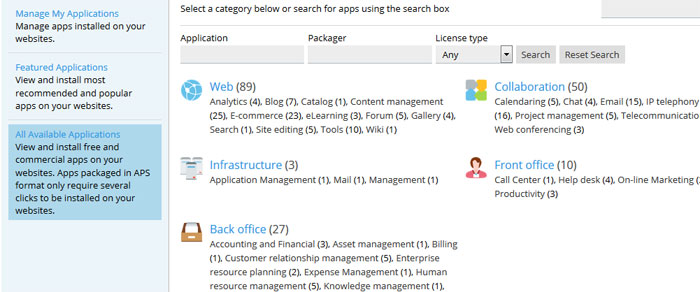 Click on each category to browse available applications, or if you know the name of the app you want to install then type it directly into the search box.
 Click on the ‘Install’ button and the application will be added automatically. You will be asked what username and password you would like and these are the details you use to login to the admin area of your new application.
Create a WordPress Website with no Technical Knowledge
Sep 17 04
WordPress was originally used as a blogging software. It is now the most popular content management system on the internet with over a quarter of the world’s websites using WordPress. 
You can still use WordPress to create a simple blog, but now it also allows you to easily create fully functional websites.
Once you have your domain and WordPress web hosting set up, you will receive your confirmation email with login details to your control panel. Inside the control panel you will find the option to automatically install the WordPress application.
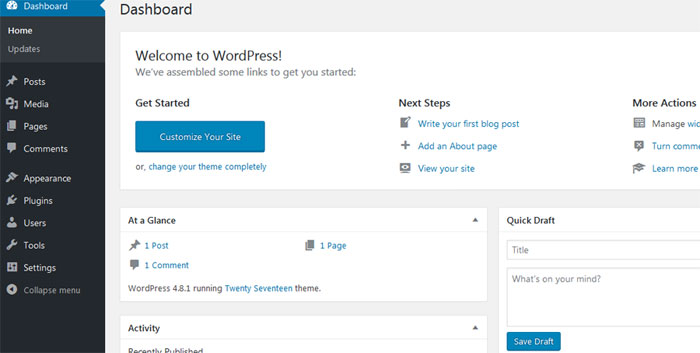
Once it is installed you will have a username and password to login to the WordPress dashboard, which is where you control all the functions of your WordPress installation.
From this main menu you can fully create the design and layout of your website. The pre-designed layout of your site is called the ‘Theme’ which can be managed in the ‘Appearance’ section. There are thousands of free and premium themes to choose from on the Internet. WordPress has its own Themes Website which loads in your Dashboard when you click on ‘Add New Theme’ Once you choose a suitable theme, simply click on Install and your theme will be ready in a few seconds. To make it live you then click on ‘Activate’ and you will then have the look to your new website.
To add an ‘About’ page and a ‘Services’ page and others, just go to the Pages section in your Dashboard and click on ‘Add New’
You then just need to add your content for each page and you have your new website.
Use a professional email address instead of Hotmail or Gmail
Jul 17 28
Using your own business email address looks much more professional than a free service such as Hotmail or Gmail.
Your email address represents you and your business so you want an address which looks established and presentable. When I receive an email from a business but the address is ‘davetheplumber@hotmail.co.uk’ it just looks unprofessional and less serious than ‘david@dhplumbing.co.uk’
Also the second address will look much more professional on the dhplumbing.co.uk website.
Like most people I have a Hotmail address and a Gmail address but they are used for personal interests such as online shopping and signing up for online services.
If you are still using a personal email address for your business, we strongly recommend that you take advantage of the free email accounts we offer. We can help you get this set up very quickly.
IP address banning
Jul 17 25
Your Name Here’s servers uses software called ‘Fail2Ban’ which is is an automated way to protect our servers from brute force attacks.  Fail2Ban uses regular expressions to monitor log files for patterns corresponding to authentication failures and other errors that are considered suspicious.
If an IP address makes too many login attempts within a certain time interval, this IP address is banned for a certain period of time.
This is to combat attacks on our servers, however if any legitimate user fails to login several times then that users ip address will be blocked. When this happens you will not be able to access your emails, view your website or upload/download any files to the server.
If you cannot login please contact us and we can go through with you how to retrieve or reset any of your user details.
How to manage your Spam Filter
Jul 17 21
As we all know spam is a nightmare. According to a recent report by Cyberoam, there are an average of 54 billion spam messages sent every day and the proportion of spam email was around 80% of all email messages sent.
Your Name Here spam filters are designed to be configurable to match the needs of your individual mailbox. As well as blocking email senders, you can also add them to white list to ensure you receive emails from them, set a tolerance level and decide exactly what to do with emails that are recognised as spam.
The steps below will help you make the most of your spam filter:
Step 1.
Log in to your control panel and click on the mail tab:
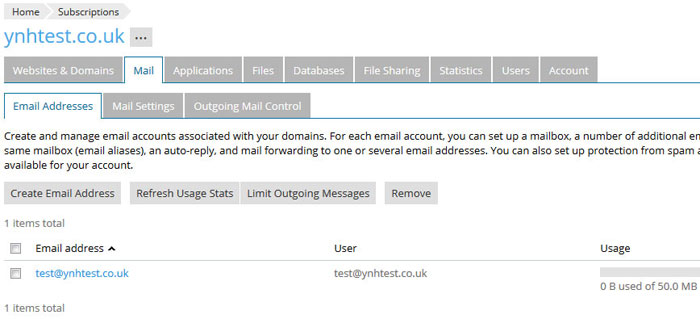
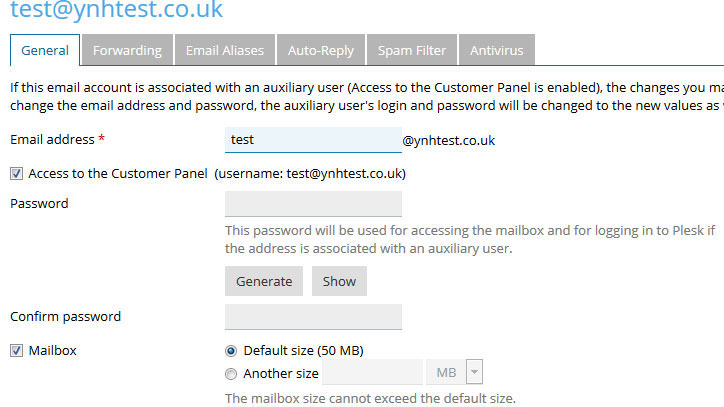
Step 2.
Click on the email address and the mailbox options page will be shown:
Step 3.
Click on the Spam Filter tab and this will give you your spam filter options.Ensure the tick box is checked to switch on the spam filtering. Then you can choose how to handle spam. The above option moves the spam into a spam folder. As mentioned, using an IMAP account you can further train the spam filter to make it pick up on all emails you want treated as spam.

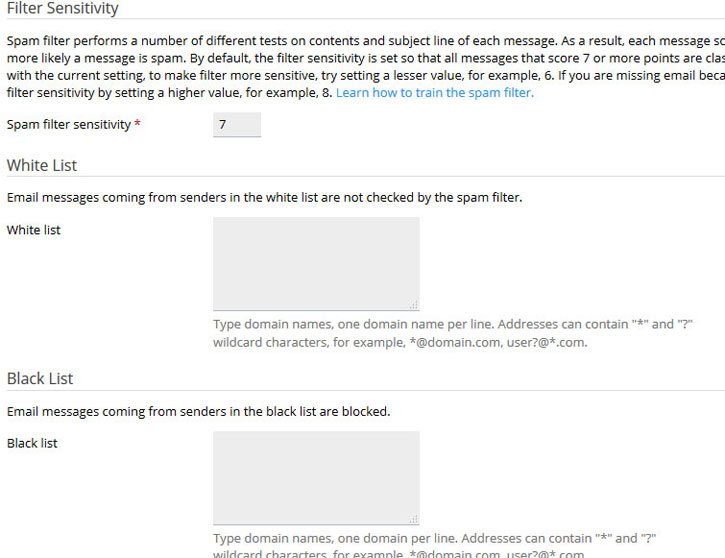
Step 4.
Click on ‘Show Advanced Settings’ and this allows you to enter safe email addresses into a ‘Whitelist’ and spam addresses into a ‘Blacklist’ It also explains the Filter Sensitivity setting which you can make more sensitive or less sensitive depending on whether or not all spam mail is being flagged:
If you have any difficulties with the settings on your spam filter please contact our support team for assistance.
How to upload your web files with FTP
Mar 17 13
The guide below will show you how to upload your website files to the web server using FTP (File Transfer Protocol)
To start with you will need your FTP user details. You will receive these in your confirmation email when you order your hosting package. If you would like us to resend the details please request this by emailing office@your-name-here.co.uk
There are many FTP programs but probably the most popular and the one we recommend is Filezilla. Click here to download and start the program.
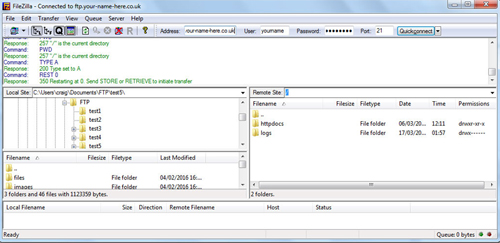
 Once you have downloaded this, open up Filezilla and you will see a ‘Quick Connect’ button in the top right of the screen.
Before you click on this you need to enter your user details which are the host address, the username and the password.
Then click Quick Connect, and double click on the ‘httpdocs’ folder to enter your hosting web space.
Once you are connected you will have 2 split windows, the left hand side is the files on your computer, the right hand side is your web space, in order to upload your files you need to either drag and drop from left to right, or double click on your left hand files to upload to the right.
You will notice the transfer progress on the bottom of the screen. If all is well Filezilla should display the files you have uploaded on the right hand screen and your website should now be visible in your internet browser window. After every new upload you will need to refresh your browser.
For multiple sites there is a Site Manager option. Click on ‘File’ in the top left corner and you will be given the following screen, which allows you to enter and save the user details, so you can easily connect at the click of a button next time:
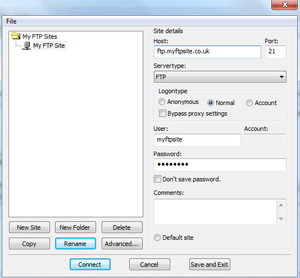
The host address, username and password will be stored in here. You simply click on ‘Connect’ to gain access to your web files on the split screen section as shown above.
How to set up an IMAP account on Samsung Galaxy
Feb 17 07
The following instructions are for setting up an IMAP account on a Samsung Galaxy:
Firstly go to the ‘Settings’ section of your Samsung and then ‘Accounts’. Then go to ‘Add Account’ then click on ‘Email’
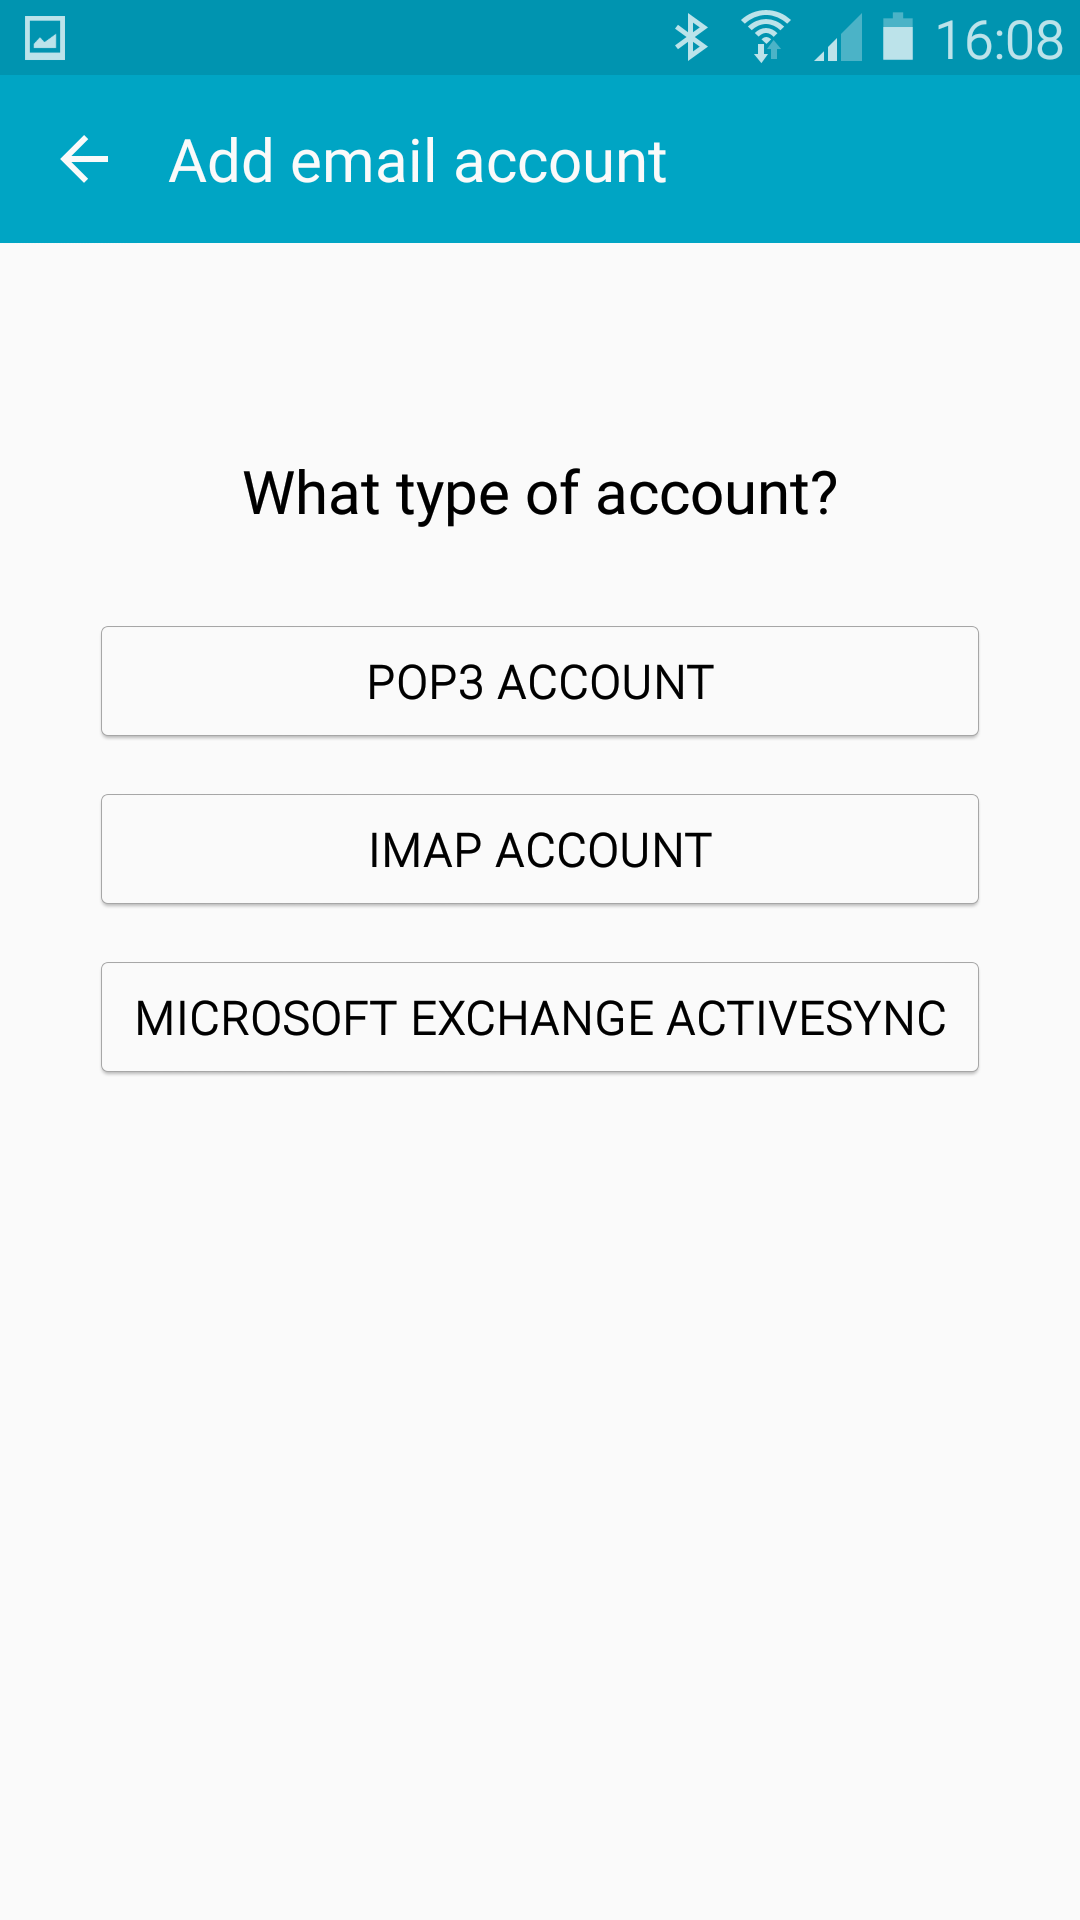
Choose IMAP ACCOUNT to start the set up.
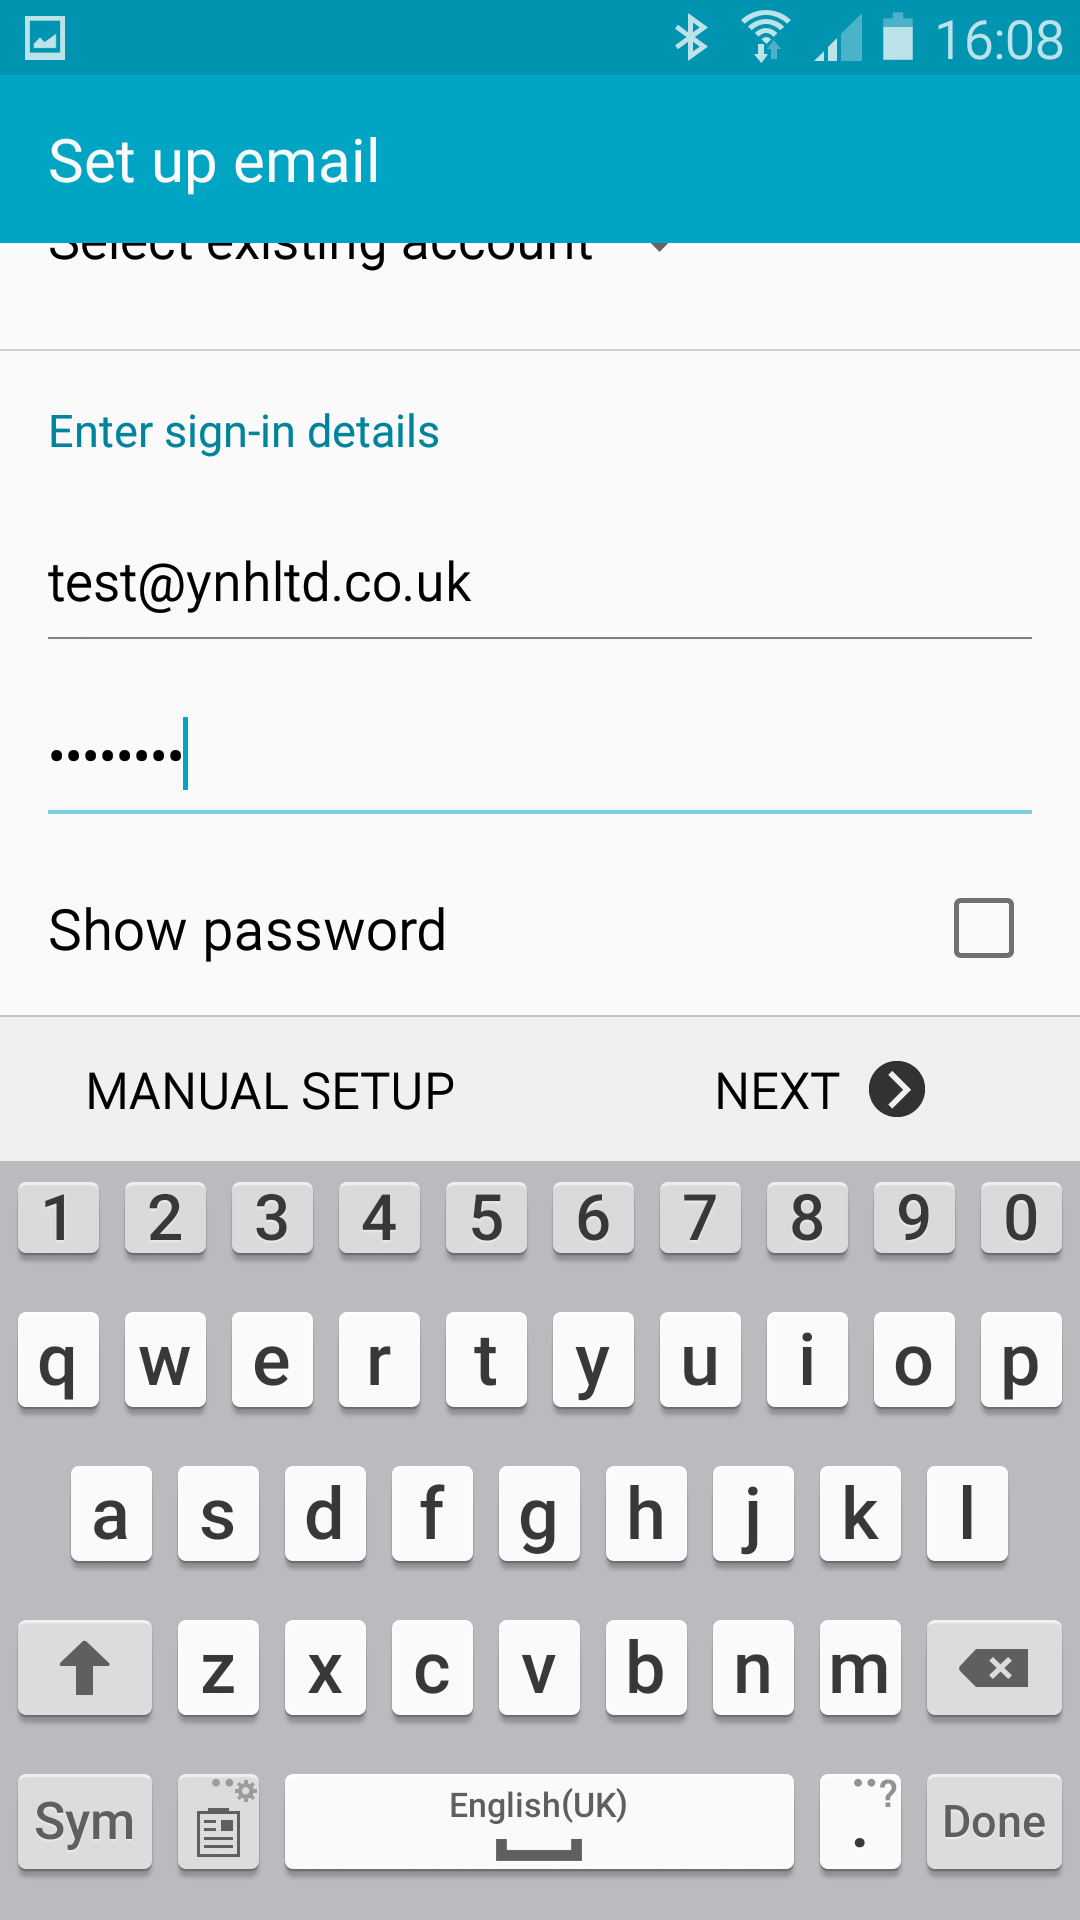
Then enter your email address and password, then click on ‘Manual Set Up’
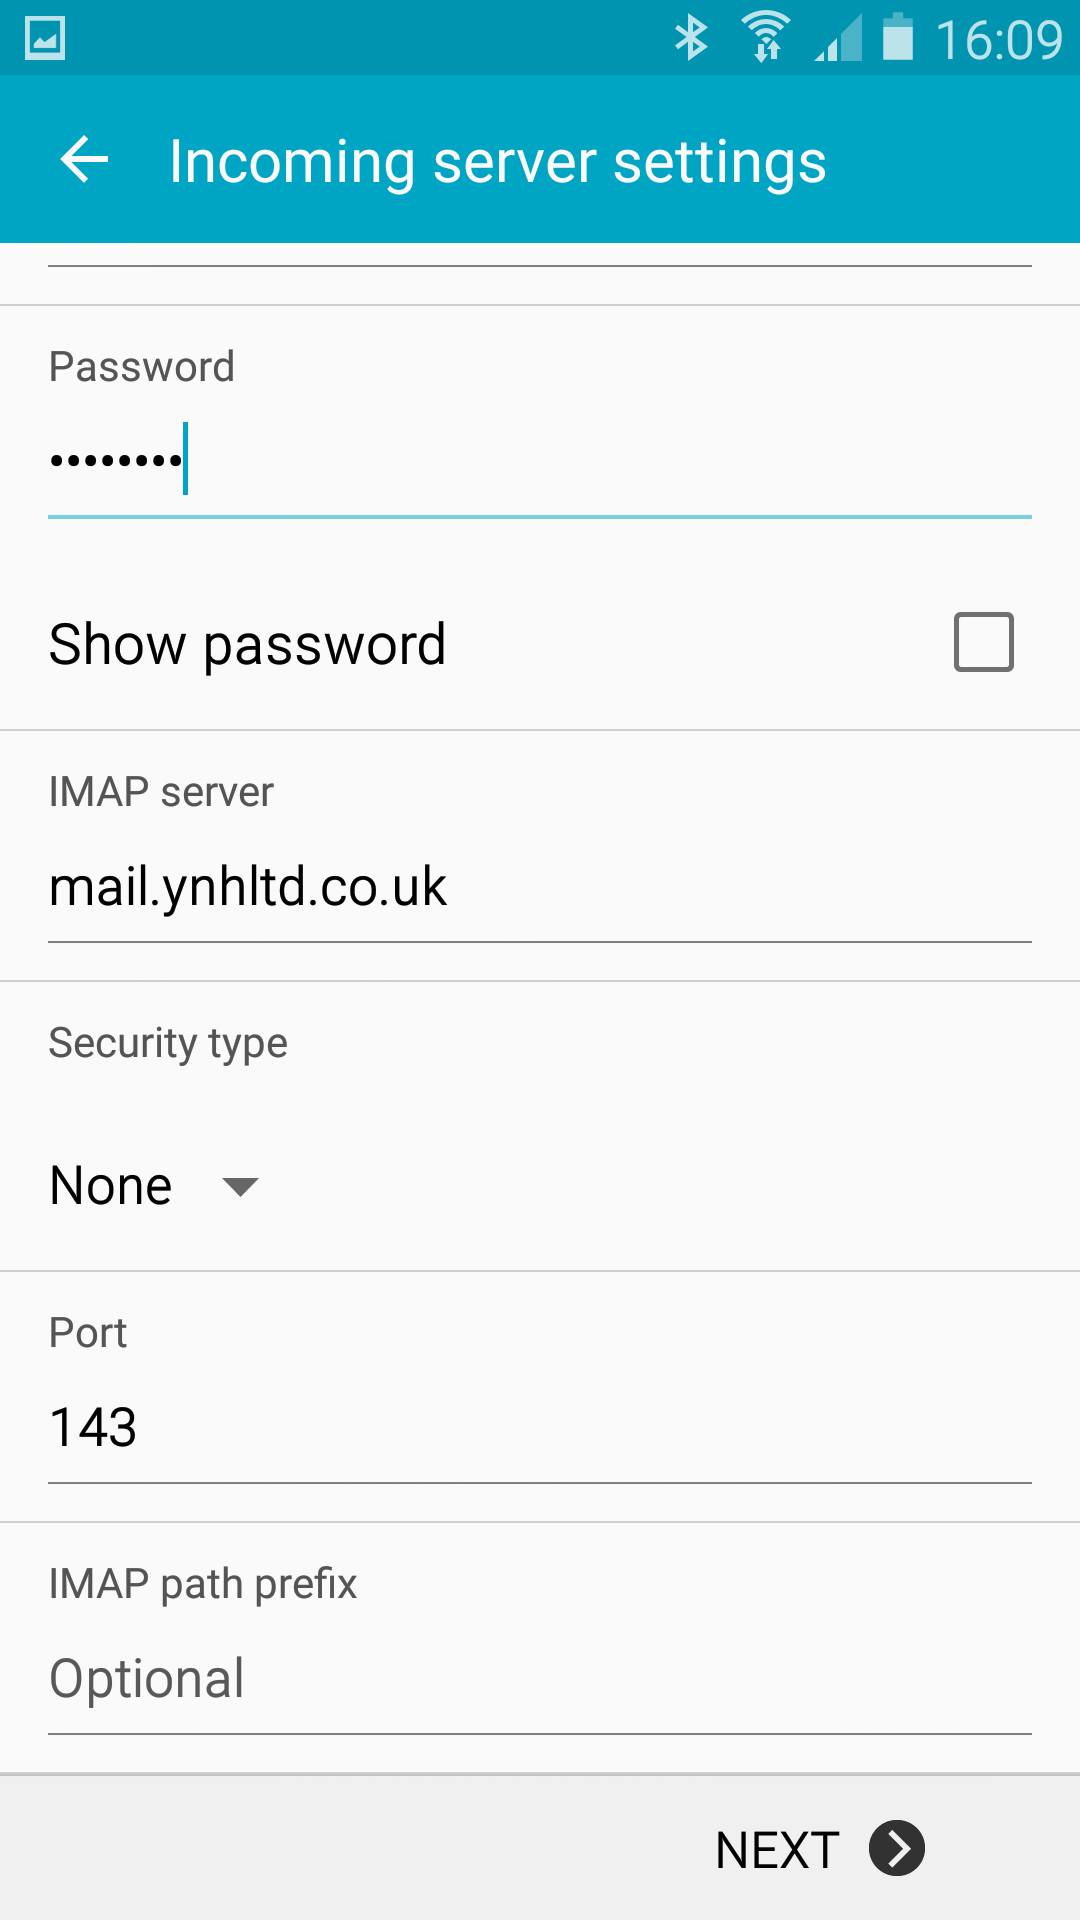
Then enter your incoming mailserver which is mail.domainname.co.uk (obviously replace domainname.co.uk with your own domain name)
Keep security type as ‘None’ and set the Port number to 143
The onto the outgoing mailserver which is exactly the same as the incoming with the Port Number set to 25
You will then be given this screen with further settings – unless you have any specific requirements you can keep all these settings on default and click on next.
This screen confirms that your account is set up and ready to use. Click ‘Done’